README file from
GithubVault LLM Assistant for Obsidian
Features
- Ask questions about your vault's content and get AI-generated answers
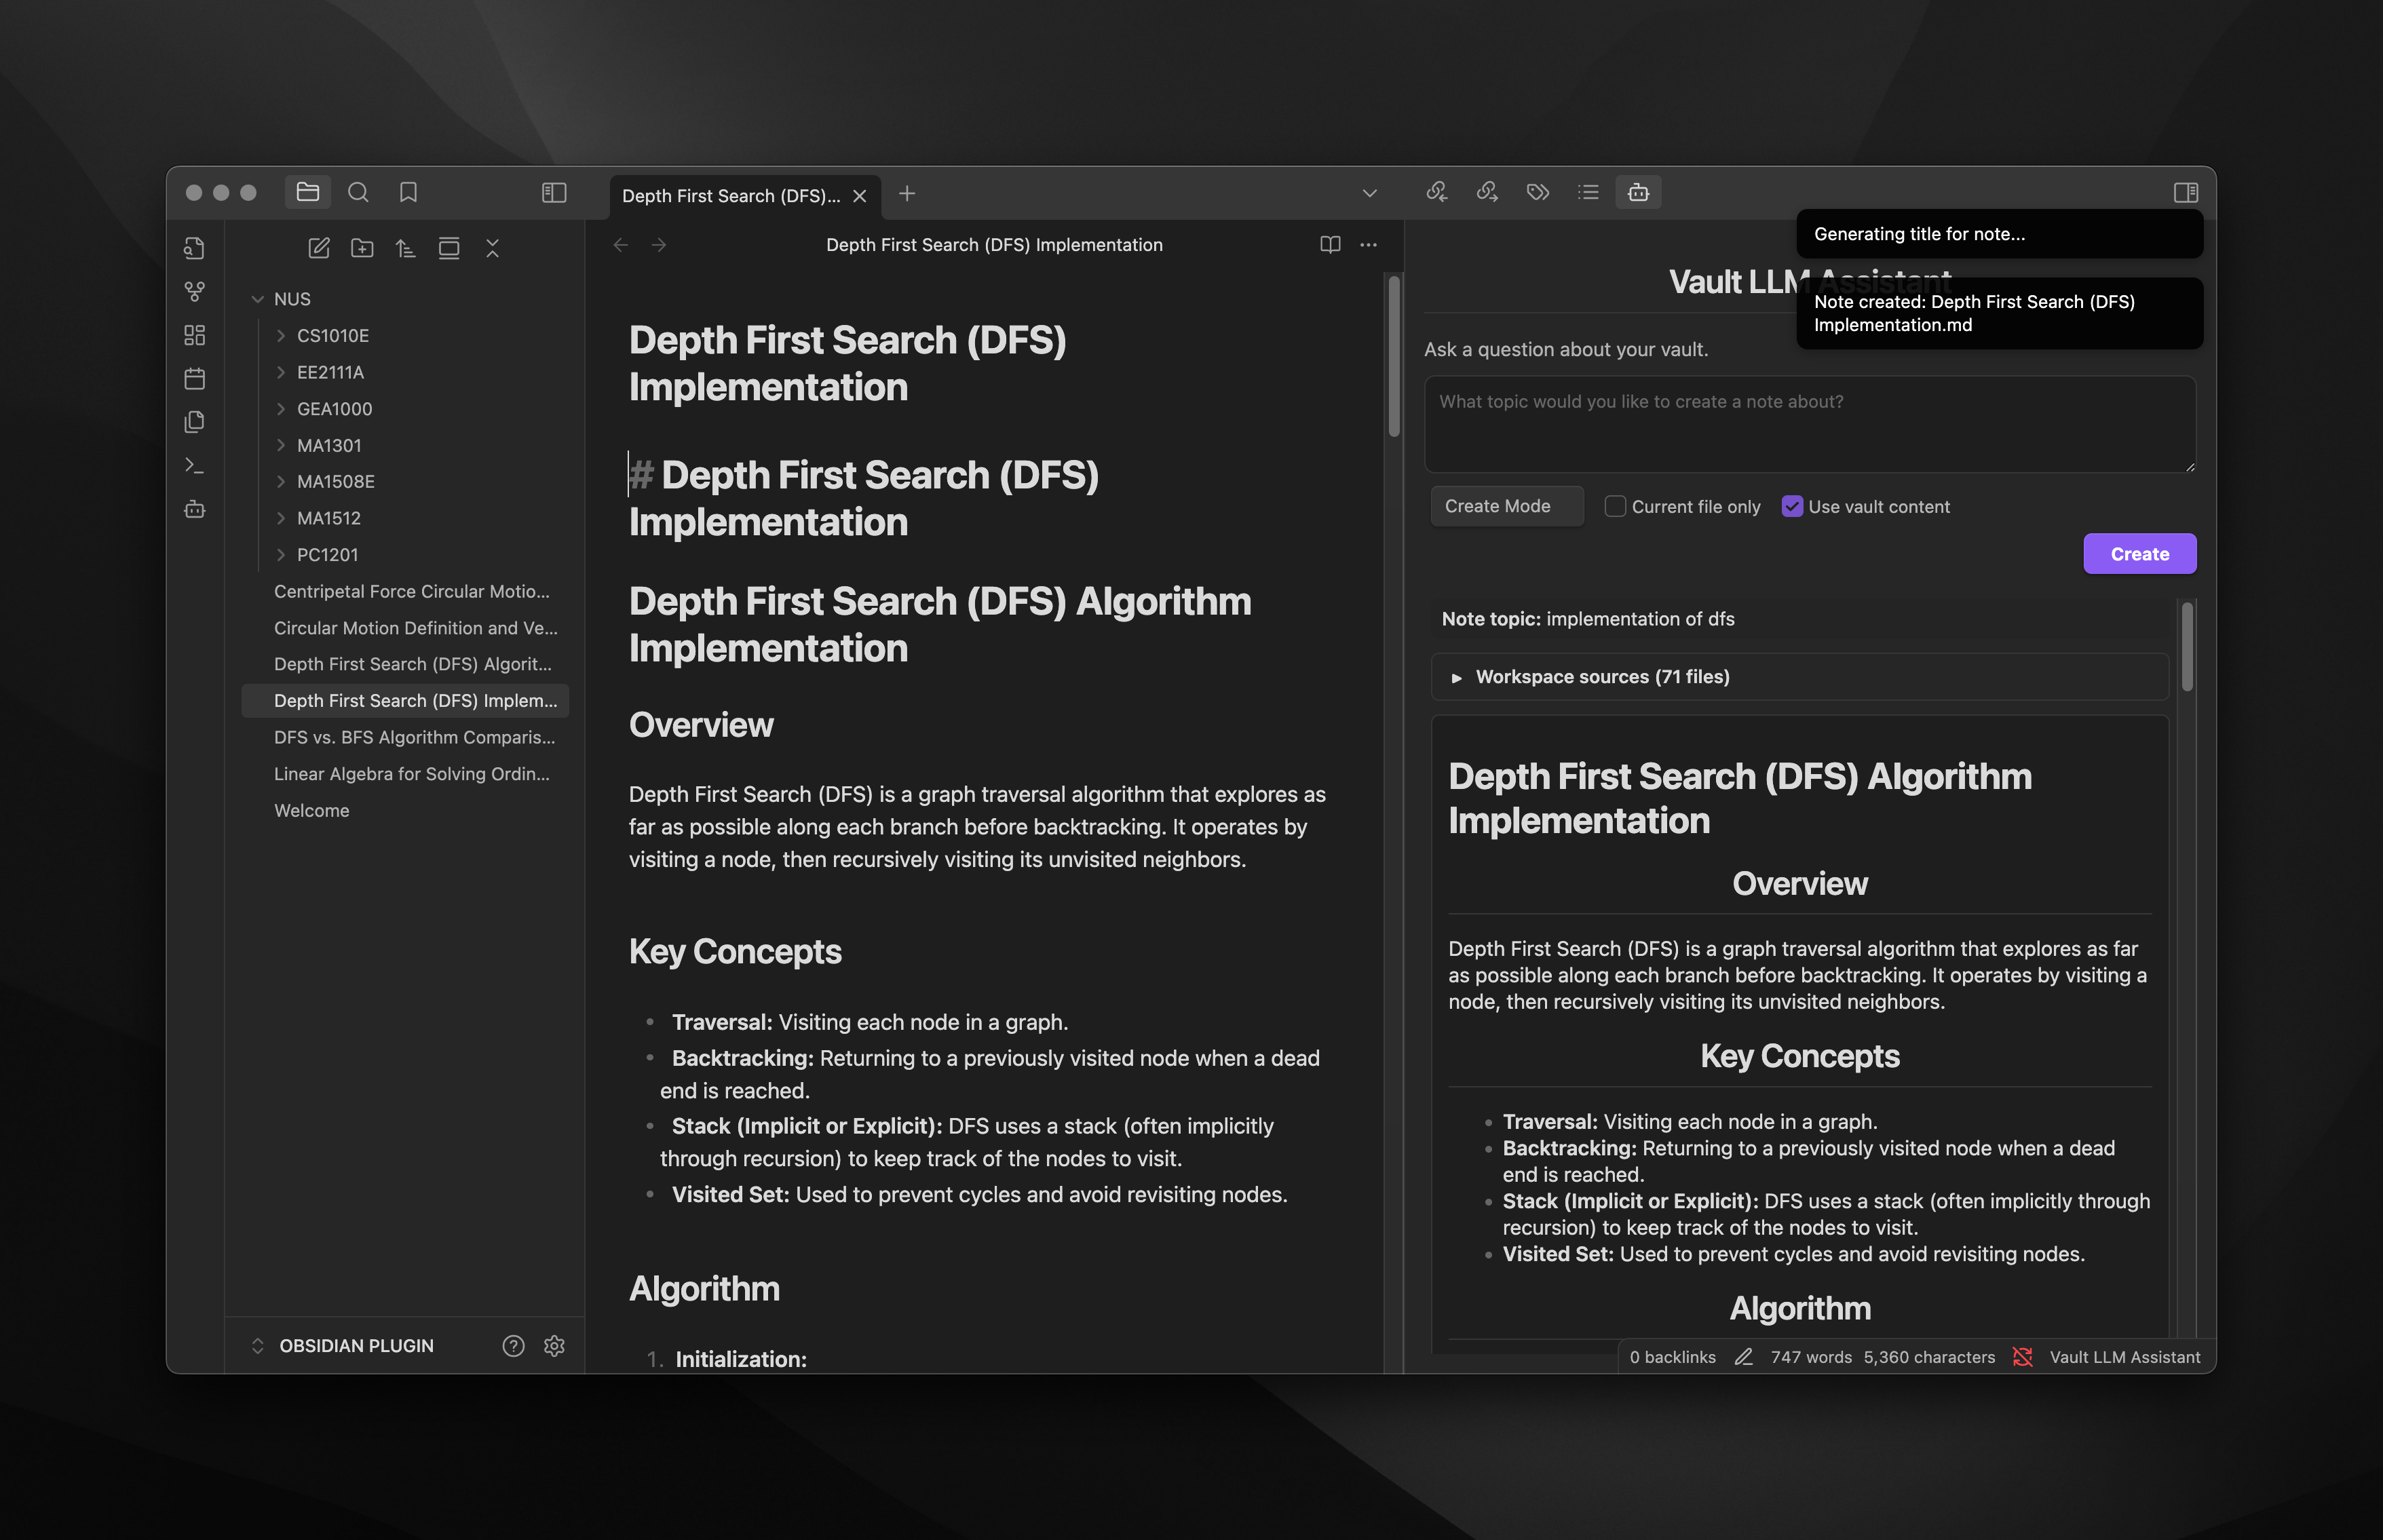
- Create comprehensive notes on any topic with optional vault context integration
- Toggle between Query mode and Create mode with a simple dropdown
- Choose whether to include vault content in your prompts
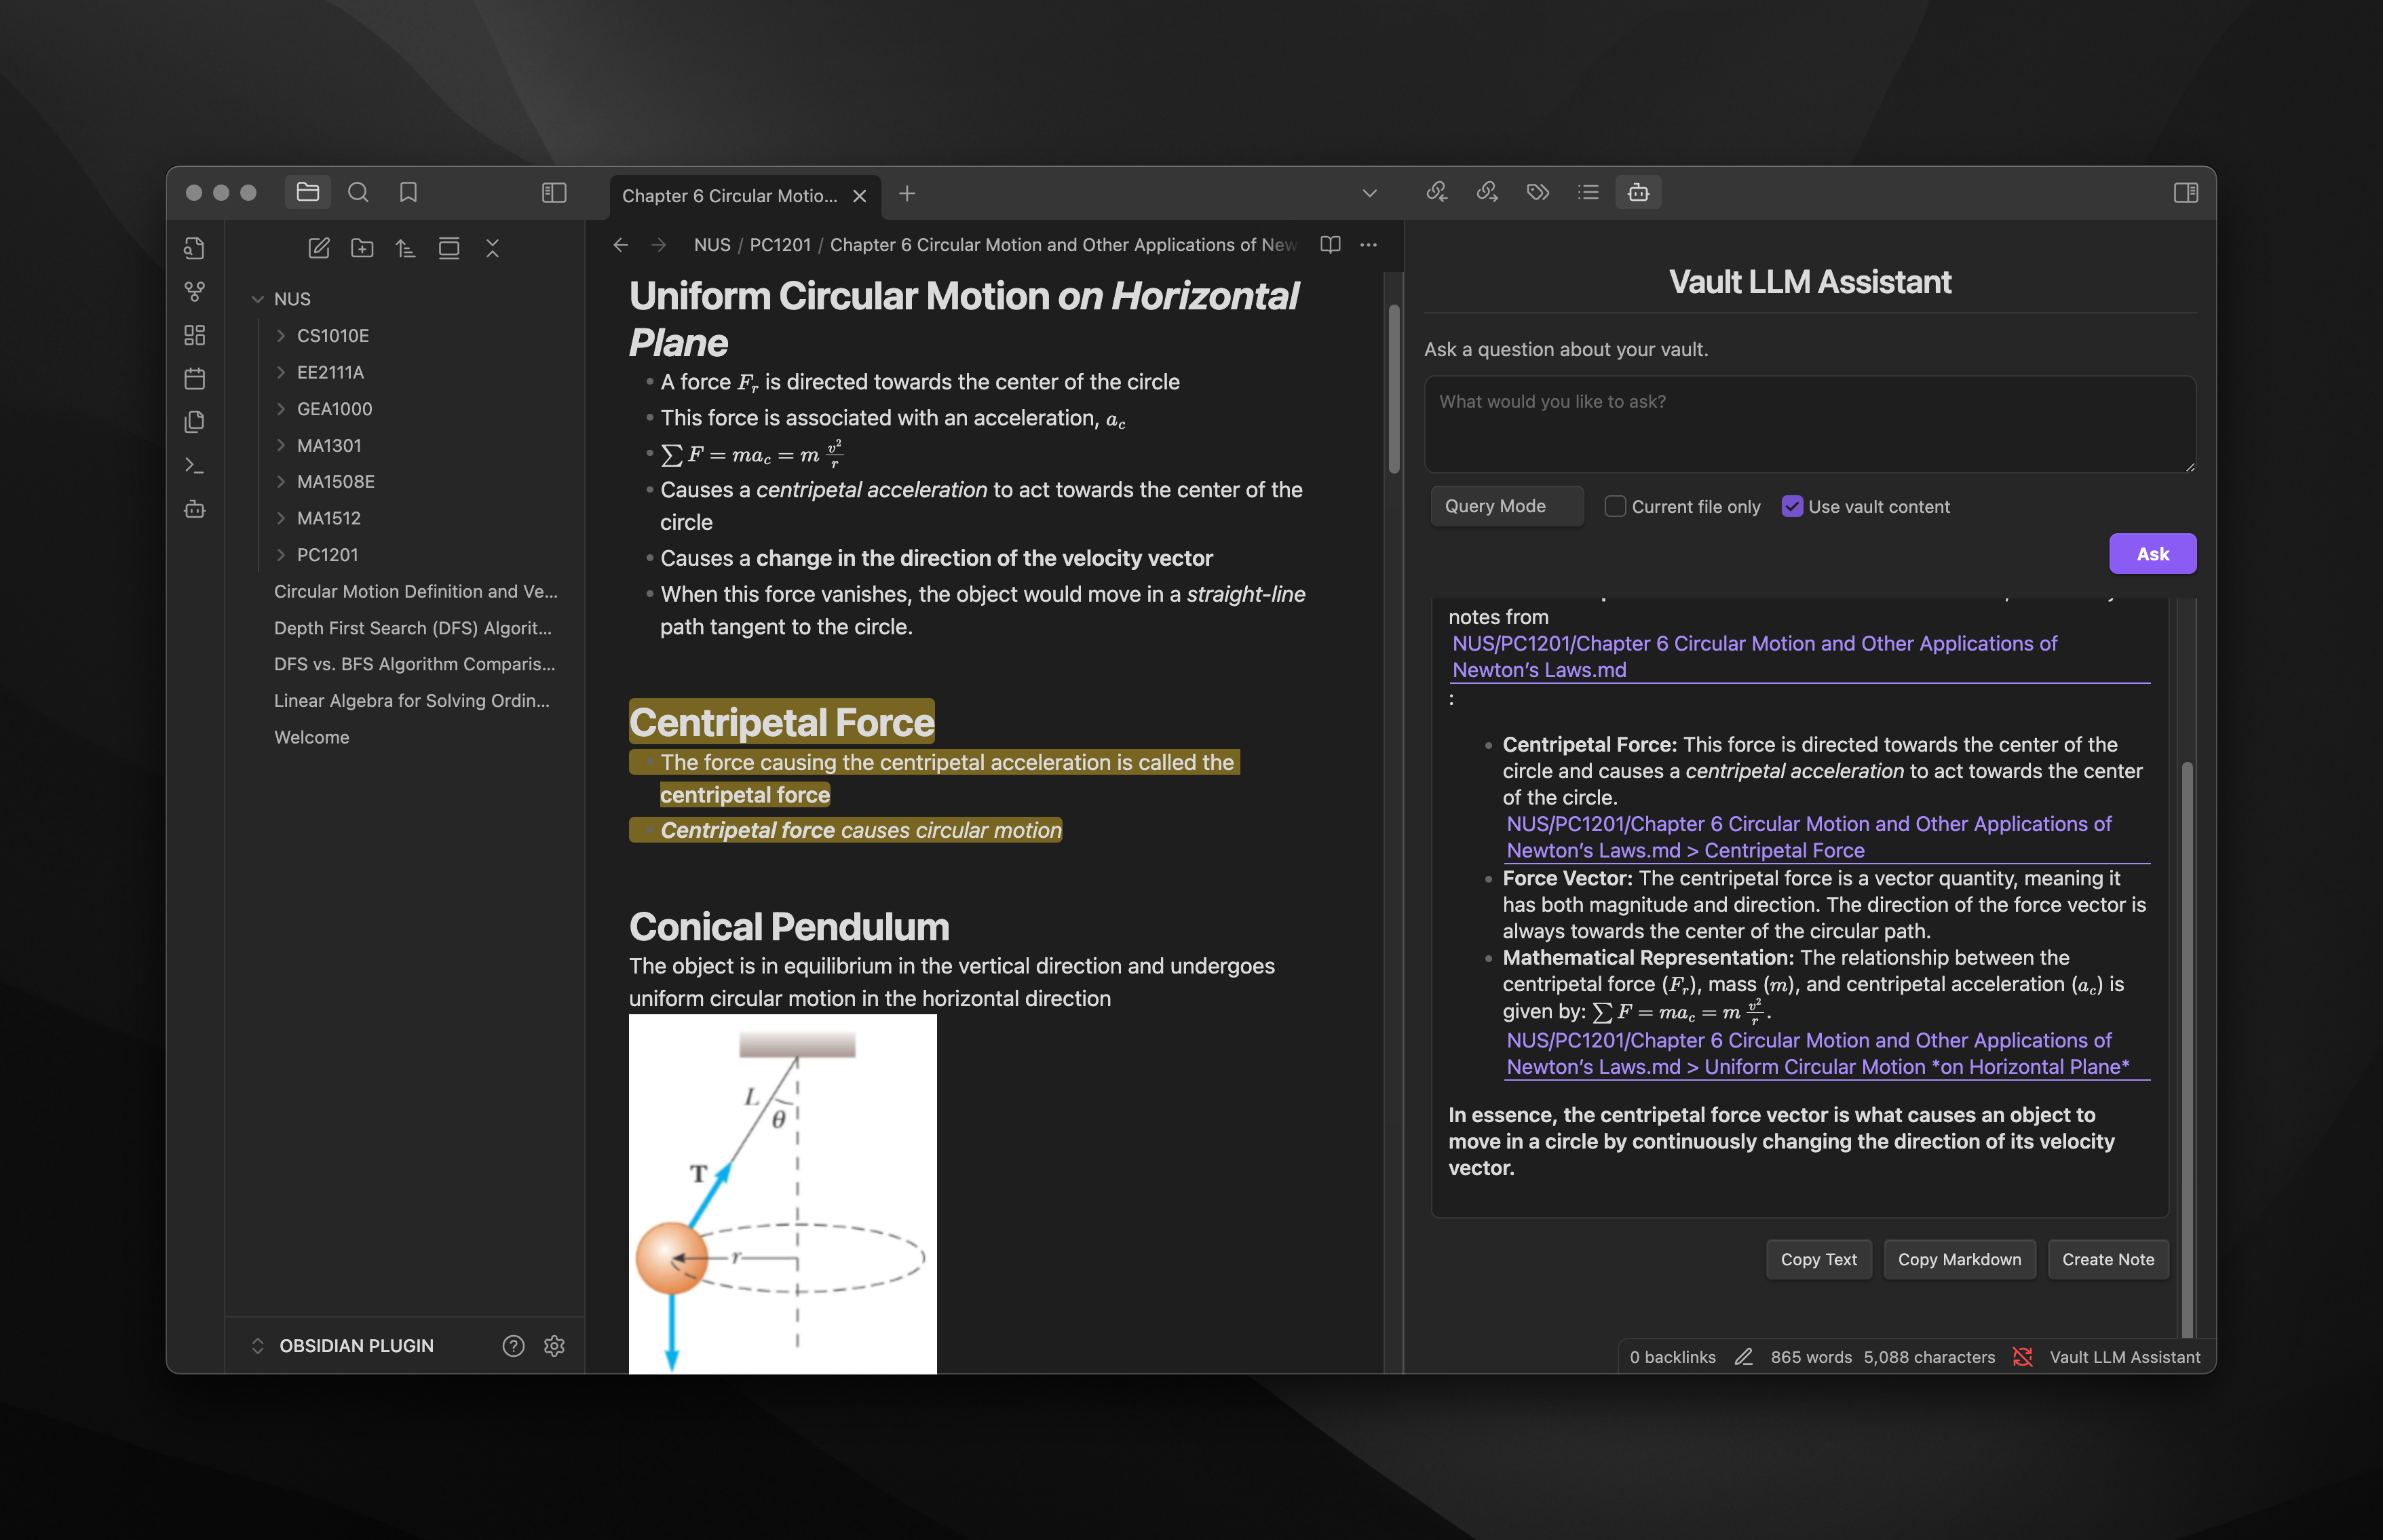
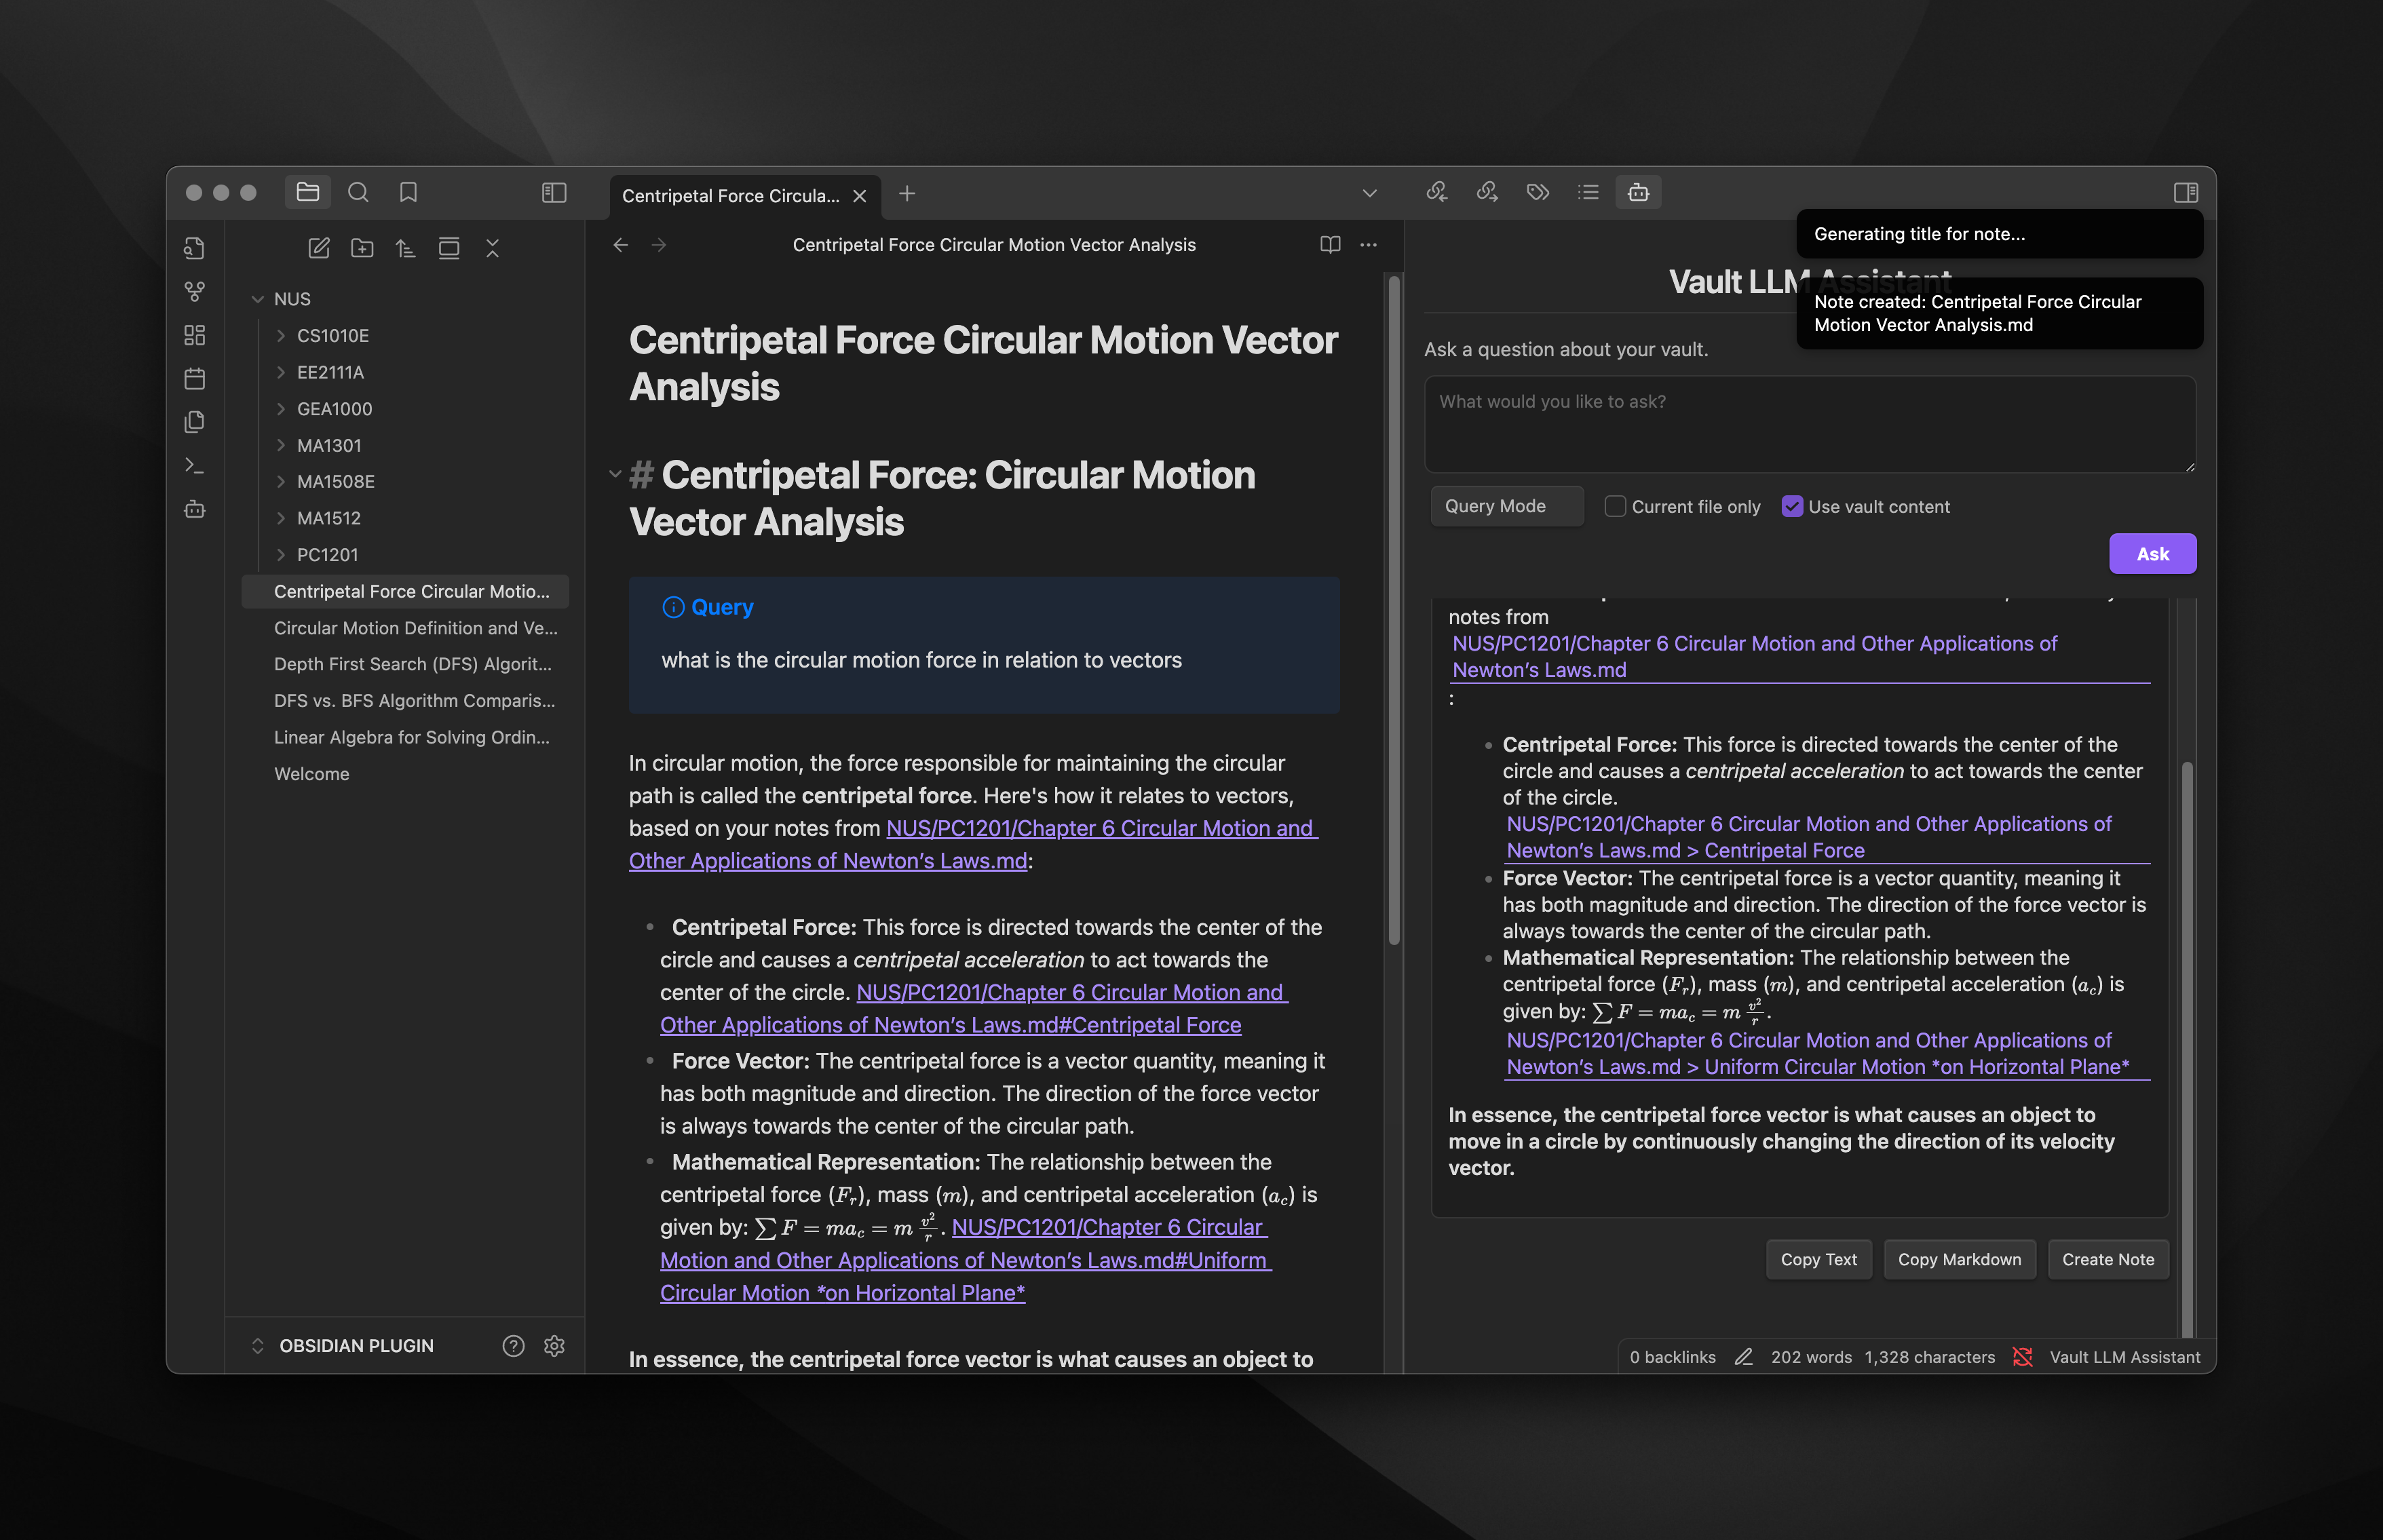
- Results include citations and links back to your original notes
- Copy results as text or markdown with one click
- Create new notes from responses with AI-generated titles
- Support for OpenAI GPT, Google Gemini, and Anthropic Claude models
- Support for local LLM (LM Studio and Ollama)
- Configure which files and folders to include or exclude from scanning
- Highlight and copy results easily
For a detailed list of changes between versions, see the Changelog.
Screenshots
Installation
From Obsidian Community Plugins
- Open Obsidian Settings → Community Plugins or use this link https://obsidian.md/plugins?id=vault-llm-assistant
- Disable Safe Mode if necessary
- Click "Browse" and search for "Vault LLM Assistant"
- Click Install and enable the plugin
Manual Installation
- Download the latest release from the GitHub releases page
- Extract the ZIP file to your vault's
.obsidian/plugins/directory - Restart Obsidian and enable the plugin in Settings → Community Plugins
Required Dependencies
After installation, install the required dependencies:
cd [your-vault]/.obsidian/plugins/obsidian-vault-llm-assistant
npm install
Usage
Basic Usage
- Click the Vault LLM Assistant icon in the left sidebar ribbon
- Select your desired mode from the dropdown (Query or Create)
- Optionally toggle "Use vault content" to include or exclude your vault's content in prompts
- Type your question or topic
- Click "Ask" (in Query mode) or "Create" (in Create mode) or press Ctrl+Enter (Cmd+Enter on Mac)
- View the AI-generated response with citations to your notes
Modes
- Query Mode: Ask questions about your vault's content and get AI-generated answers
- Create Mode: Generate comprehensive notes on any topic, with or without using your vault content as context
Response Actions
After receiving a response, you can:
- Highlight and copy text: Select text normally as the response is fully selectable
- Copy Text: Click the "Copy Text" button to copy the response as plain text
- Copy Markdown: Click the "Copy Markdown" button to copy the response with markdown formatting
- Create Note: Click the "Create Note" button to save the response as a new note in your vault
Configuration Options
Access plugin settings via Settings → Community Plugins → Vault LLM Assistant:
- LLM Provider: Choose between OpenAI GPT and Google Gemini
- API Key: Enter your API key for the selected provider
- Model: Select which AI model to use
- Max Tokens & Temperature: Control response length and creativity
- Use Vault Content in Prompts: Toggle whether to include vault content in AI prompts
- Mode: Select the current mode (Query or Create)
- Default Folder for New Notes: Set where new notes will be saved
- Generate Note Titles with LLM: Toggle whether to use AI for generating note titles
- Include/Exclude Folders: Specify which folders to include or exclude from scanning
API Keys
- OpenAI: Get your API key from OpenAI Platform
- Google Gemini: Get your API key from Google AI Studio
- Anthropic Claude: Get your API key from Anthropic Console
- Local LLM: Connects to your local instance of LM Studio or Ollama
Local Development
To set up for local development:
# Clone the repository
git clone https://github.com/brianstm/obsidian-vault-llm-assistant.git

# Enter the project directory
cd obsidian-vault-llm-assistant

# Install dependencies
npm install

# Start development server with hot-reload
npm run dev
Troubleshooting
If you encounter issues:
- Verify your API key is correct and active
- Check that you've installed all dependencies with
npm install - Ensure your API key has access to the models you've selected
- Check console logs for specific error messages (Ctrl+Shift+I in Obsidian)
License
This project is licensed under the MIT License.
Credits
- Developed by Brians Tjipto
- Website: brianstjipto.xyz
If you find this plugin helpful, please consider starring the GitHub repository!