README file from
GithubObsidian Hill Charts


An Obsidian plugin for adding hill charts to your notes.
- Create hill charts inline by writing a tiny bit of YAML.
- Customizable styles and sizes
- What is a hill chart?
Installation
Please install via the regular Community Plugins setting tab within Obsidian.
Usage
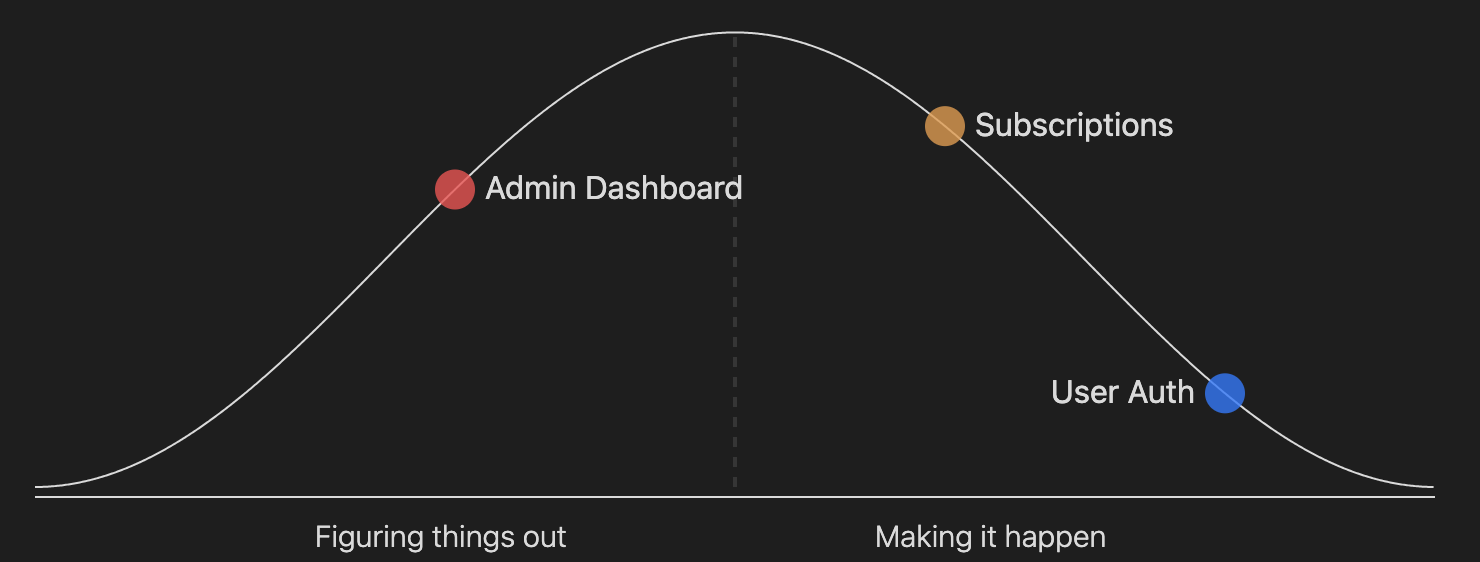
Once installed, you can define a hillchart in a code block like this:
```hillchart
points:
  - position: 30
    text: Admin Dashboard
  - position: 85
    text: User Auth
  - position: 65
    text: Subscriptions
 ```
There are 5 available options you can pass to each point:
- position: 30
  text: Admin Dashboard
  color: "#fb3590"
  size: 15
  opacity: 0.5
And you can optionally set the width and height of a hillchart like this:
points:
  - position: 10
width: 600
height: 150
The default width & height, plus the size and opacity of each point can be configured in the plugin settings.
Contributing
You can follow the Obsidian instructions for setting up a plugin in a development vault, swapping the git clone command for this repo instead of the sample plugin.
If you want to fix a bug or add a new feature, please:
- Fork the project.
- Create a feature branch (
git checkout -b my-new-feature). - Make your changes. Include tests for your changes, otherwise I may accidentally break them in the future.
- Run the tests with the
npm exec jestcommand. Make sure that they are still passing. - Write descriptive commit messages.
- Push the branch to GitHub (
git push origin my-new-feature). - Create a Pull Request and submit it to be merged with the main branch.
Building locally
npm run dev # this will watch for code changes and recompile
Testing
npm exec jest
Releasing
npm version [patch|minor|major]
git push origin master --tags