README file from
Githubobsidian-nerv
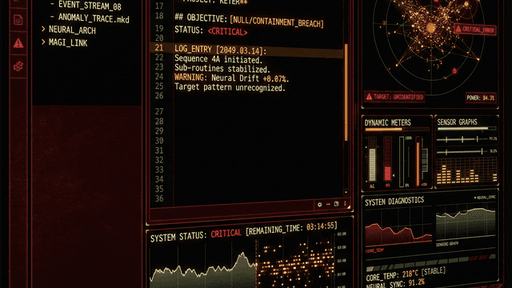
A NERV theme for Obsidian, inspired by the MAGI and EVA-01 displays from Neon Genesis Evangelion.
Watch the demo
https://github.com/user-attachments/assets/f0c06cc4-0b06-4e93-a8ff-6f2df5618a0f
Installation
Note: This theme is currently under review for inclusion in the official Obsidian community theme gallery. You can track the progress or review our submission over at obsidianmd/obsidian-releases#11081.
Once obsidian-nerv is added to the community theme gallery, you can install it directly within Obsidian:
- Open Obsidian Settings.
- Go to Appearance -> Themes -> Manage.
- Search for NERV UI (or
obsidian-nerv). - Click Install and use.
Note: The theme supports both Dark and Light modes, seamlessly adjusting to your preferred base color scheme.
Local testing and development
For detailed information on creating and contributing themes to Obsidian, refer to the official Obsidian Theme documentation.
To apply and test the NERV UI in your own Obsidian vault:
- Locate your vault's theme folder:
- In your vault, navigate to
.obsidian/themes/.
- In your vault, navigate to
- Set up the project:
- Clone or copy this repository into that folder:
.obsidian/themes/obsidian-nerv/. - Alternatively, you can use a symlink (recommended for active development):
# Windows (Command Prompt as Admin)
mklink /D "C:\Path\To\Your\Vault\.obsidian\themes\obsidian-nerv" "c:\Users\ethan\Documents\GitHub\obsidian-nerv"
- Clone or copy this repository into that folder:
- Activate the theme:
- Open Obsidian Settings > Appearance.
- Select NERV UI from the Themes dropdown.
- Set Base color scheme to Dark.
- Development workflow:
- This project uses Prettier for formatting. Run
npm run formatafter making changes. - Obsidian will automatically hot-reload your theme as you save
theme.css.
- This project uses Prettier for formatting. Run
Customization
This theme supports the Style Settings plugin! With Style Settings installed, you can natively adjust the NERV terminal colors—including the signature Central Dogma red, emergency alerts, and telemetry accents—without touching any CSS.
- Install "Style Settings" from the Obsidian Community Plugins directory.
- Enable the plugin.
- Open Settings > Style Settings and look for NERV Terminal System.
Operational tiers
1. Command center (global)
- Aesthetic: Pattern Blue accents and high-contrast countdowns.
- CRT Simulation: 2.5px pitch scanlines and RGB phosphor-bleed are applied globally.
2. Entry plug (tactical)
- Trigger: Tactical tags like
#alert/angelshift the environment. - Alert Levels:
- Pattern Blue (#alert/angel): High-level detection state.
- Pattern Red (#alert/terminal): Emergency state with a 10Hz industrial flicker.
3. Magi (strategic)
- Status Readouts: Use monospaced JetBrains Mono for all diagnostic logs and UI labels.
- Typography: Matisse EB headers are mechanically compressed
(
scaleX(0.85)) to evoke the "urgency motif" of the original Tokyo-3 terminals.
Tag-driven logic
Add the following tags to your note properties (YAML) to shift the UI state:
| Tag | State | Visual Effect |
|---|---|---|
#alert/angel |
Pattern Blue | Blue tint + Solid 3px border |
#alert/terminal |
Pattern Red | Red tint + 10Hz Flicker |
#status/diagnostic |
Monospaced | High-density data layout |
Layout principles
- Industrial Brutalism:
border-radiusis set to0pxacross the entire application. - Data Saturation: Padding and margins are minimal to simulate "The Burden of Knowledge."
- Viewport Brackets: Each workspace leaf is framed by HUD-style angular brackets.
Developer setup (symlink)
To enable real-time synchronization between this repository and your Obsidian vault:
- Delete any existing
obsidian-nervfolder in your.obsidian/themes/directory. - Open Command Prompt as Administrator.
- Run the following command:
Replacemklink /D "C:\Path\To\Your\Vault\.obsidian\themes\obsidian-nerv" "c:\Users\user\Documents\GitHub\obsidian-nerv"C:\Path\To\Your\Vaultwith your actual Obsidian vault path.
Adding your theme to the theme gallery
Add a screenshot thumbnail
Inside the repository, include a screenshot thumbnail of your theme. You can
name the file anything, for example screenshot.png. This image will be used
for the small preview in the theme list.
Your screenshot file should be 16:9 aspect ratio. The recommended size is
512x288.
Submit your theme for review
To have your theme included in the Theme Gallery, you will need to submit a Pull
Request to
obsidianmd/obsidian-releases.
Pushing updates
Obsidian automates the theme update process! You do not need to create another Pull Request to obsidianmd/obsidian-releases once your theme is approved.
Instead, Obsidian fetches updates directly from your GitHub repository's Releases.
How to release a new version
- Update your version number: Run the version bump script to automatically update
manifest.jsonand stage the files:npm run version - Commit and push: Commit your changes and push them to your
mainbranch:git commit -m "chore: bump version" git push origin main - Create a GitHub Release:
- Go to your repository on GitHub and click on Releases > Draft a new release.
- Create a new tag matching your version number (e.g.,
1.0.1). - Add release notes describing your changes.
- Crucial step: You must attach your
manifest.jsonandtheme.cssfiles to the release assets. You can drag and drop them directly into the "Attach binaries by dropping them here" area. - Click Publish release.
That's it! When users go to Settings > Appearance > Themes > Check for updates in Obsidian, the app will see your new GitHub Release and prompt users to update automatically.
Compatibility (versions.json)
For major updates that might break compatibility with older Obsidian versions, update the versions.json file. It maps your theme version to the minimum required Obsidian app version:
{
	"1.0.0": "0.16.0",
	"1.0.1": "0.16.0"
}
This prevents users on older Obsidian versions from downloading an incompatible theme update.
Citations and accreditation
This project is a non-commercial fan tribute to the visual world of Neon Genesis Evangelion.
Official credits
- Original Series & IP: Created by Hideaki Anno.
- Production Studios: Studio Gainax (Original Series) and Studio Khara (Rebuild of Evangelion).
- IP Management: All rights and trademarks are managed by Groundworks Co., Ltd. on behalf of Studio Khara.
Design inspiration
The visual language of this theme is a forensic reconstruction based on the Fictional User Interface (FUI) designs seen in the original 1995 series and the Rebuild films. We acknowledge the groundbreaking work of the original GAINAX and Khara design teams who defined the "Narrative Friction" aesthetic.
Community attribution
Special thanks to the Evangelion fandom and the contributors to resources like EvaGeeks, whose meticulous documentation of tech-readouts and UI frames made this reconstruction possible.
Special recognition goes to Pedro Fleming for his exceptional FUI recreations, which served as a vital reference for the technical accuracy and motion aesthetics of these NERV terminal screens.
God's in his heaven. All's right with the world.