
README file from
Githubwk image caption
English | 简体中文
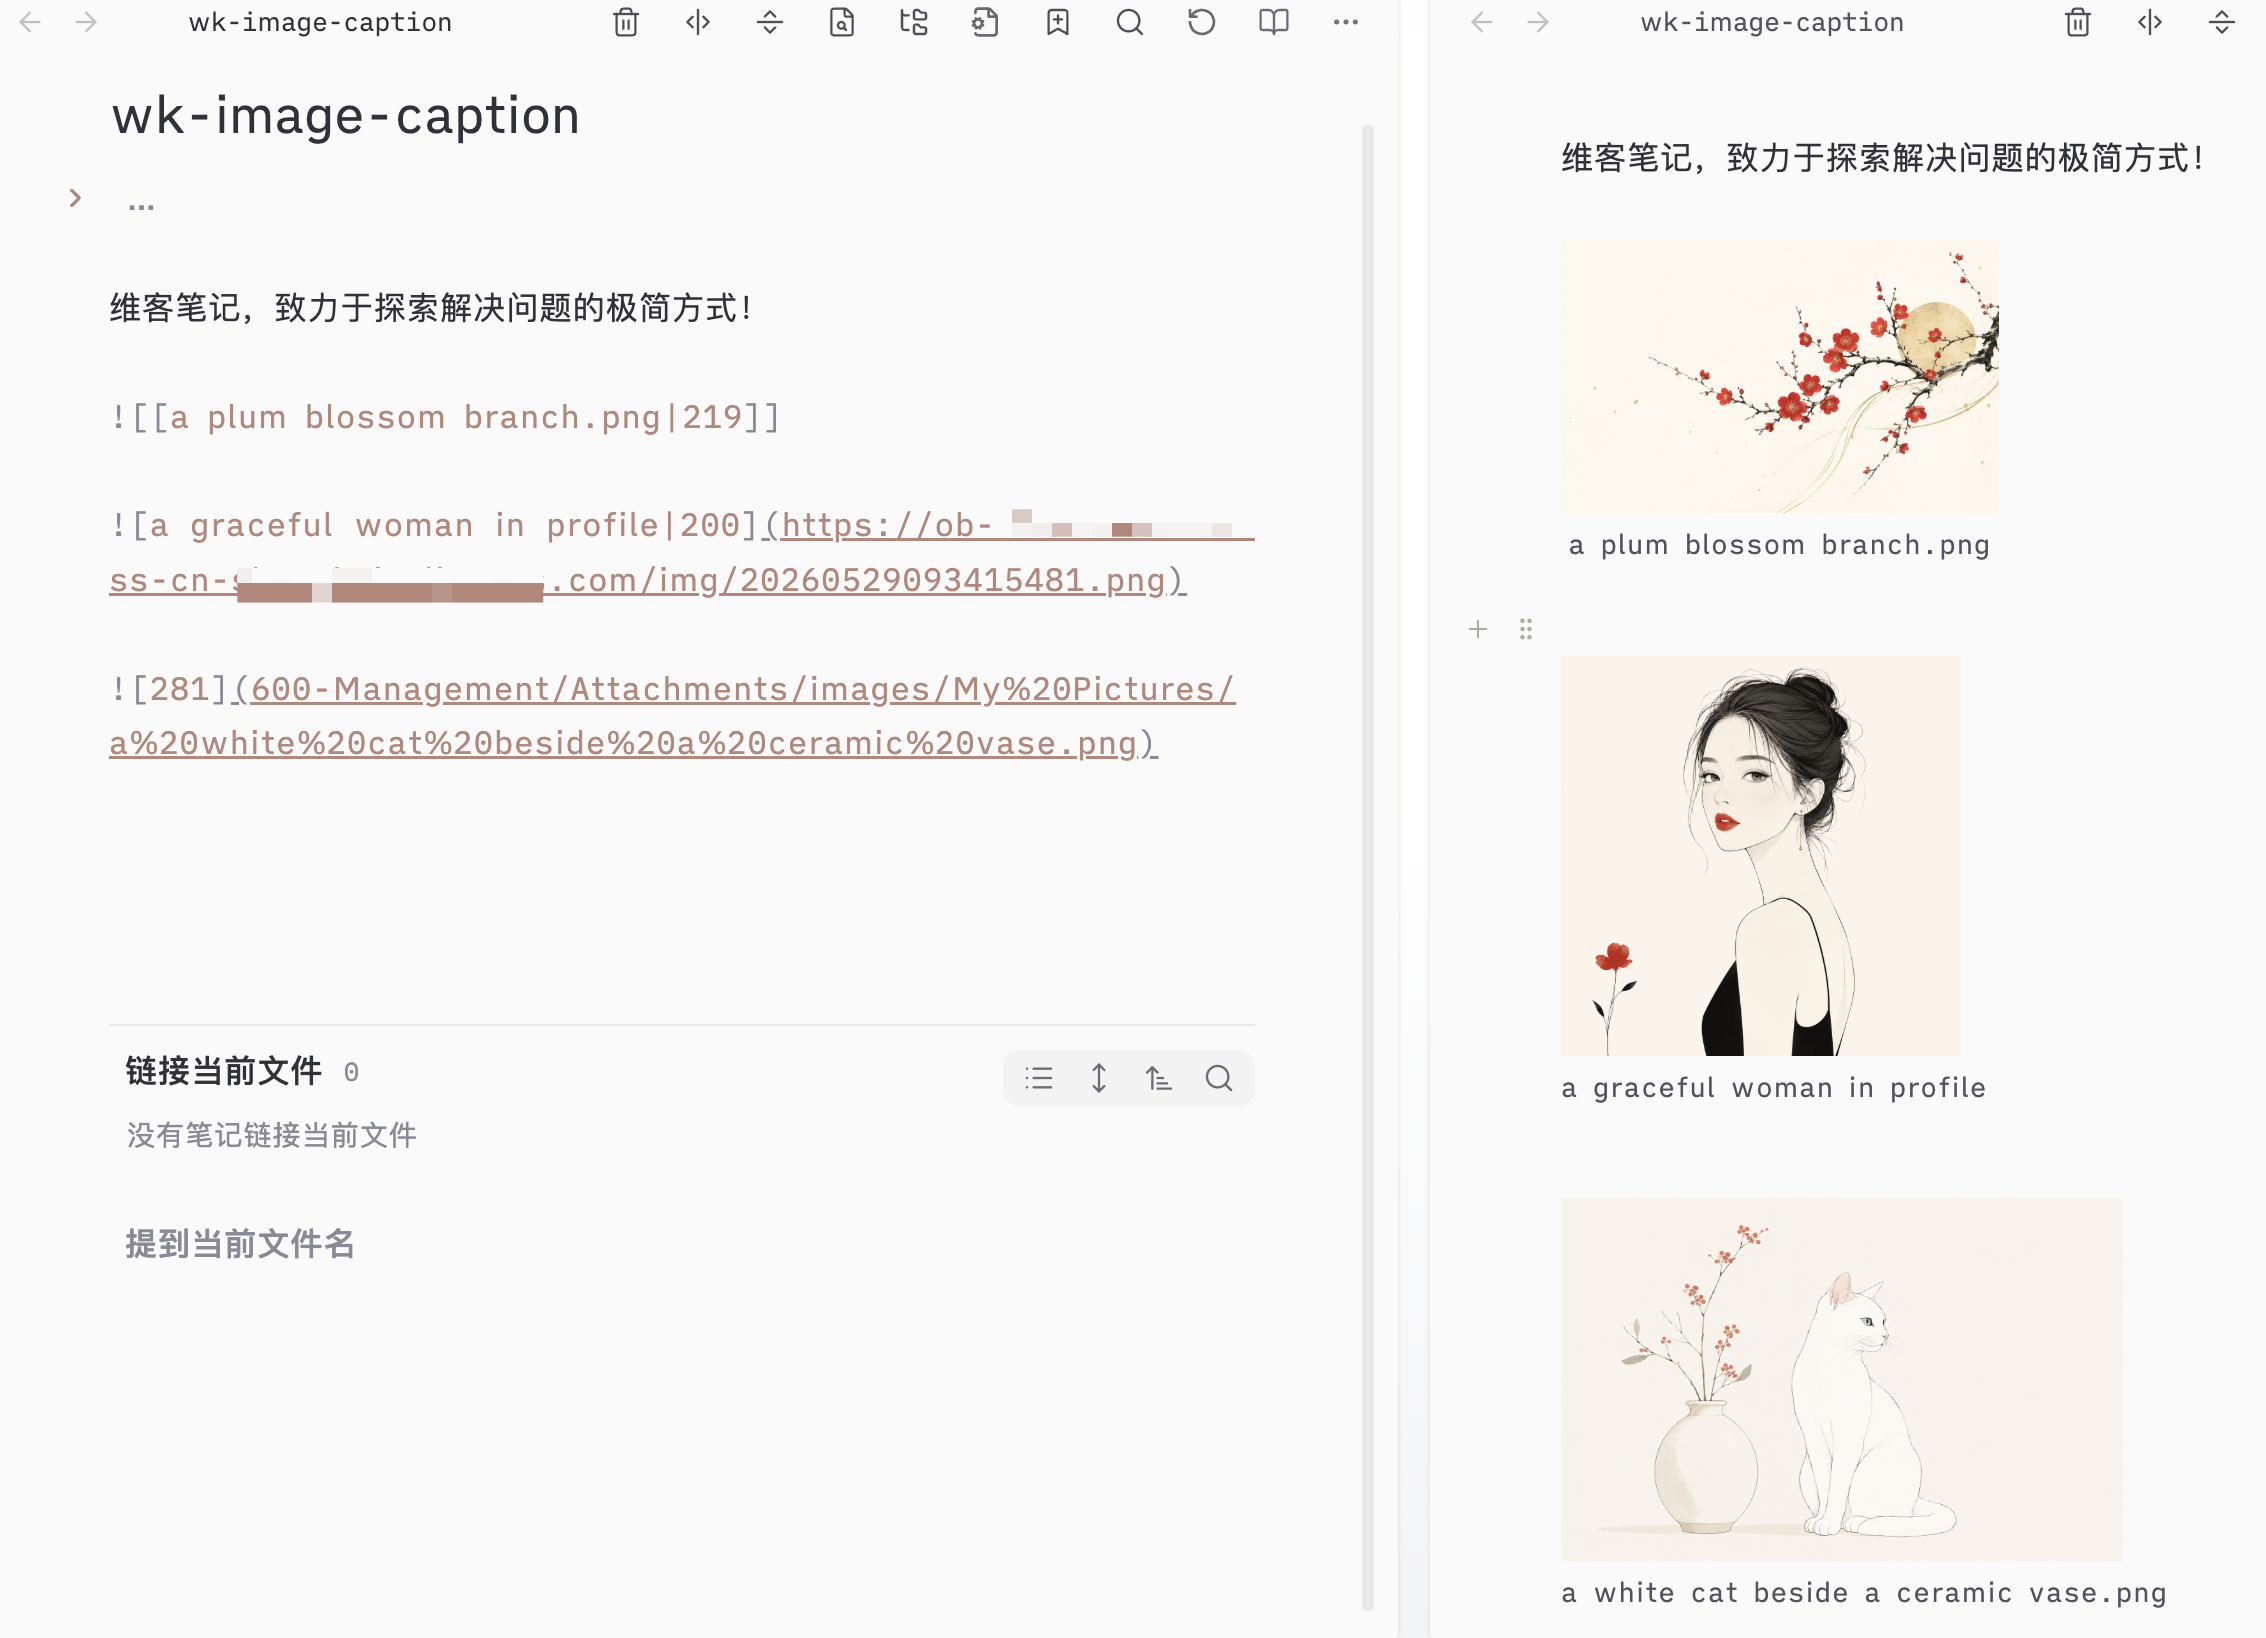
Show elegant, customizable captions under images in both Live Preview (Editing) and Reading Mode in Obsidian. Fully supports standard Markdown images, Wiki embeds, and external image hosts.


✨ Features
- 🔄 Dual Mode Support: Works flawlessly in both Reading Mode and Live Preview (Editing Mode).
- 📝 Syntax Autoclass: Supports both standard Markdown links
and Obsidian Wiki links![[image.png|alias]]. - 🏷️ Smart Size Filter: Automatically parses and strips out image resizing parameters (e.g.,
|300,|200x300) to extract only the pure caption text. If only size is specified (e.g.,![[image.png|300]]), no caption is displayed. - 🎨 Dynamic CSS Layout: Leverages CSS
:has()parent selector to automatically correct parent Flexbox layout (flex-direction: column) when captions are injected. No layout shifting, and zero overlapping. - 🪟 Multi-Window (Popout) Ready: Fully adheres to Obsidian's modern window management, using
activeDocumentand context-aware elements instead of globaldocument. Zero crashes when moving tabs to separate windows. - ⚙️ Customizable Settings:
- Toggle displaying file names as a fallback caption when no alt/alias text is set.
- Customize text alignment (Left, Center, Right).
- Customize text styling (Italic or Normal).
- Instant UI updates without reloading the plugin.
🚀 Installation
Option 1: Via Obsidian Community Plugins (Recommended)
- Open Obsidian Settings > Community plugins.
- Click Browse and search for
wk image caption. - Click Install, then Enable the plugin.
Option 2: Manual Installation
- Go to the Releases page and download
main.js,manifest.json, andstyles.css. - Locate your Obsidian Vault's plugins folder:
<vault>/.obsidian/plugins/. - Create a folder named
wk-image-captionand paste the downloaded files inside. - Open Obsidian Settings > Community plugins and toggle wk image caption on.
🛠️ Usage & Examples
1. Wiki Embed Format
# Show caption
![[landscape.png|A majestic view of the Swiss Alps]]

# Show resized image with caption (strips the size automatically)
![[landscape.png|Snowy mountain peaks|300]]

# Resize only (no caption shown)
![[landscape.png|400]]
2. Standard Markdown Format
# Local image

# External image host
💻 Development
Contributions are welcome! If you want to build this plugin from source:
- Clone this repository to your computer.
- Install dependencies:
npm install - Run the compiler in development mode (hot reloading on save):
npm run dev - Build for production:
npm run build
📄 License
This plugin is licensed under the MIT License.
简体中文
在 Obsidian 的编辑模式(Live Preview)和阅读模式下为图片显示优雅、可定制的说明文字(Caption)。支持标准 Markdown 图片、Wiki 嵌入图片以及外部图床图片。
✨ 核心功能
- 🔄 双模式完美渲染:同时适配 阅读模式 (Reading Mode) 与 实时预览模式 (Live Preview)。
- 📝 语法全兼容:兼容标准 Markdown
及 Wiki 内链![[image.png|别名]]。 - 🏷️ 智能尺寸过滤:自动识别并过滤图片缩放后缀(如
|300或|200x300),完美提取文字部分作为说明。若仅指定了尺寸,则保持界面清爽,不生成空白说明。 - 🎨 智能布局抗干涉:借助 CSS
:has()伪类关系选择器,仅在容器内含有说明文字时,动态将父 Flex 容器翻转为垂直排列(column),杜绝文字错位挤压到图片右侧的排版痛点。 - 🪟 完美兼容独立多窗口:遵循多窗口上下文安全规范。在 Obsidian 最新的独立标签页/分屏窗口(Popout Window)中进行编辑与阅读,100% 零崩溃、零报错。
- ⚙️ 即时生效的个性化设置:
- 支持未指定别名时是否以“图片文件名”作为兜底说明的开关。
- 支持对齐方式(靠左、居中、靠右)自定义。
- 支持字体风格(常规、斜体)自定义。
- 修改设置即时响应,无需重载软件。
🚀 安装方式
方法一:通过 Obsidian 社区插件市场安装(推荐)
- 打开 Obsidian 的 设置 > 社区插件。
- 点击 浏览 并搜索
wk image caption。 - 点击 安装,随后选择 启用。
方法二:手动安装
- 前往 Releases 下载
main.js、manifest.json和styles.css。 - 进入您 Vault 的插件目录
<vault>/.obsidian/plugins/。 - 新建名为
wk-image-caption的文件夹,将这三个文件放进去。 - 打开 Obsidian 的 社区插件 选项卡,启用该插件。