README file from
GithubToggl Import
Import Toggl Track time entries into your Obsidian daily notes with a single command.
The active note's filename (yyyy-mm-dd) determines the date, entries are fetched from Toggl's API, and the formatted output is inserted at the cursor — no manual copying.
Features:
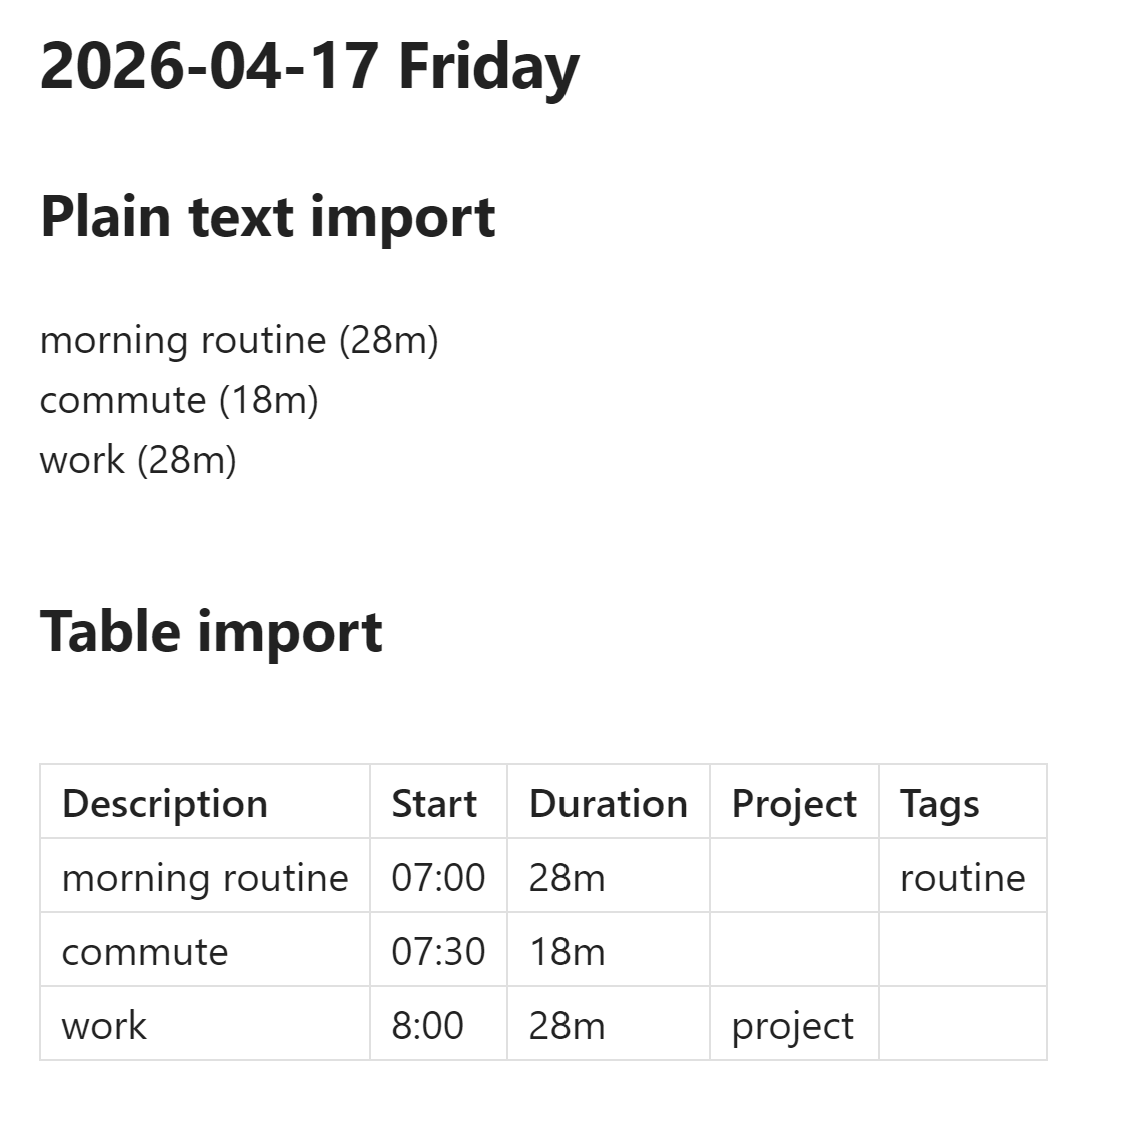
- Three output formats: Markdown table, plain text (configurable delimiter), or custom
template (
$description,$start,$duration,$tags,$projectplaceholders) - Configurable columns: Description, Start time, Duration, Tags, Project
- Sort entries by start time (ascending or descending)
- Secure API token storage — device-local, not synced via Obsidian Sync
- Test connection button to verify your API token before importing
Manual Installation
- Download
main.jsandmanifest.jsonfrom the latest release on GitHub. - Create the folder
<vault>/.obsidian/plugins/obsidian-toggl-import/if it does not already exist. - Copy
main.jsandmanifest.jsoninto that folder. - Open Obsidian Settings > Community plugins, scroll to the plugin list, and enable Toggl Import.
Install via BRAT
BRAT lets you install pre-release plugins directly from a GitHub repository.
- Install the BRAT plugin from the Obsidian Community plugins list.
- In BRAT settings, click Add Beta Plugin.
- Paste
theaspect/obsidian-toggl-importand confirm. - Open Settings > Community plugins and enable Toggl Import.
Usage
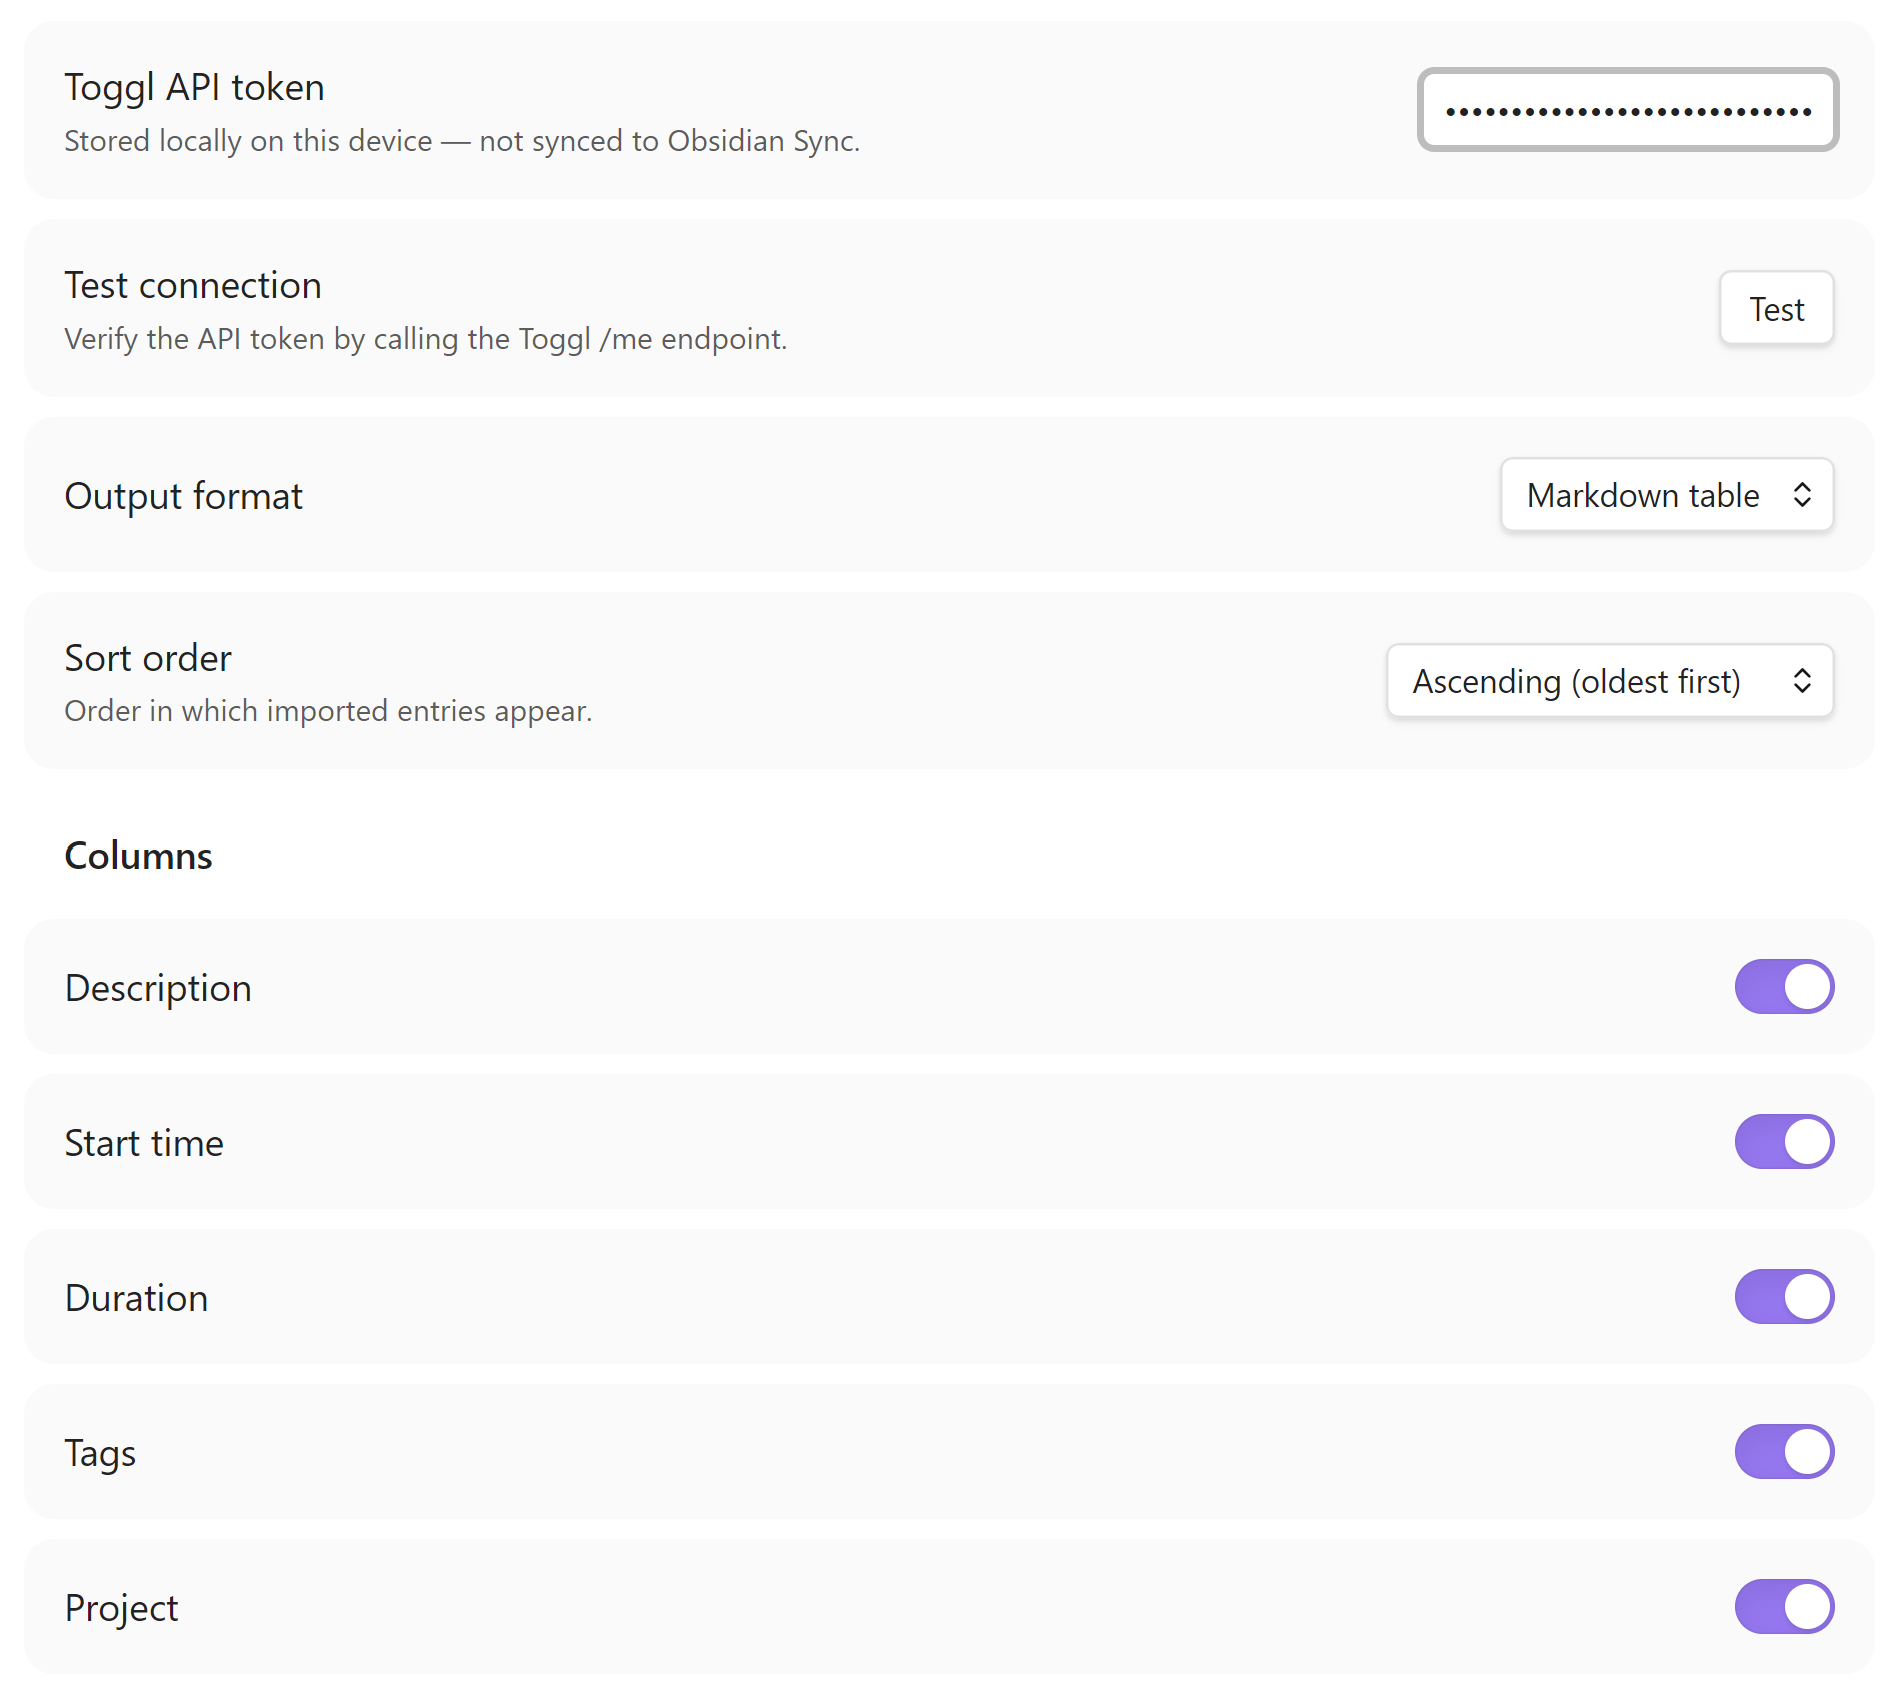
- Open Settings > Toggl Import, paste your Toggl API token (found at track.toggl.com/profile under "API Token"), then click Test to verify the connection.
- Open (or create) a daily note whose filename starts with a date in
yyyy-mm-ddformat — e.g.2026-04-16.mdor2026-04-16 Wednesday.md. - Place your cursor where you want the entries inserted.
- Open the command palette (Ctrl/Cmd+P) and run Toggl Import: Import Toggl Entries.
- Time entries for that date appear at the cursor position, formatted according to your settings.
Running the command again appends new entries rather than replacing existing ones.
Settings
| Setting | Description | Default |
|---|---|---|
| Toggl API token | Your Toggl Track API token, stored locally on this device | (empty) |
| Test connection | Verify the token by calling the Toggl /me endpoint |
— |
| Output format | Markdown table, Plain text, or Custom template |
Markdown table |
| Delimiter | Column separator used in plain text mode | | |
| Template | Template string for custom template mode. Available variables: $description, $start, $duration, $tags, $project |
$description ($duration) |
| Sort order | Ascending (oldest first) or Descending (newest first) |
Ascending |
| Columns | Toggle individual columns: Description, Start time, Duration, Tags, Project. Disabled in template mode (template controls output). | Description, Start time, Duration enabled |
Third-Party Service
- Account requirement — Using this plugin requires a Toggl Track account and API token. Sign up at track.toggl.com.
- Network communication — The plugin communicates with the Toggl Track API (
https://api.track.toggl.com) to fetch your time entries. No data is sent to any other server. Refer to Toggl's privacy policy at toggl.com/legal/privacy for details on how Toggl handles your data. - No affiliation — This plugin is an independent open-source project and is not affiliated with, endorsed by, or associated with Toggl OÜ or the Toggl Track product.
Development
git clone https://github.com/theaspect/obsidian-toggl-import.git
cd obsidian-toggl-import
npm install
npm run dev      # watch mode — rebuilds on every file save
npm run build    # type-check + production bundle
npm test         # run tests
Copy main.js and manifest.json to your vault's plugin folder
(<vault>/.obsidian/plugins/obsidian-toggl-import/) for manual testing. The
Hot-Reload community plugin auto-reloads the
plugin whenever main.js changes — no Obsidian restart needed.
Releasing a new version
- Bump the version number (must be bare semver — e.g.
1.1.0, notv1.1.0) in three files:manifest.json—"version"fieldpackage.json—"version"fieldversions.json— add a new entry mapping the new version to itsminAppVersion, e.g."1.1.0": "1.8.7"
- Commit the version bump:
git commit -am "chore: bump version to 1.1.0" - Push a bare semver tag:
git tag 1.1.0 && git push origin 1.1.0
GitHub Actions picks up the tag and publishes the release automatically — no manual draft or upload needed.