README file from
GithubSubtitles MD
Read .srt/.vtt subtitle & transcript files as comfortable, searchable Markdown in Obsidian — no media playback required.
Features
- Convert subtitle files to notes — run the "Convert subtitle file to transcript note" command on any
.srt/.vttfile to create a clean, readable Markdown note. - Embed transcripts with code blocks — use
```transcriptblocks to render inline subtitle content or reference a subtitle file withfile: path/to/sub.srt. - Read-only transcript view — click any
.srt/.vttfile in your vault to open it as a readable transcript without converting it. - Configurable reflow & formatting — control how cues are grouped into paragraphs, how timestamps and speakers are displayed, and whether to include frontmatter metadata — all via Settings.
- Pure Markdown output — transcript text becomes first-class vault content: searchable via Obsidian's search, linkable with
[[wikilinks]], and ready for annotation.
Screenshots
Code Block Rendering

A transcript code block renders inline subtitle content as clean, readable paragraphs in reading view.
Read-Only File View
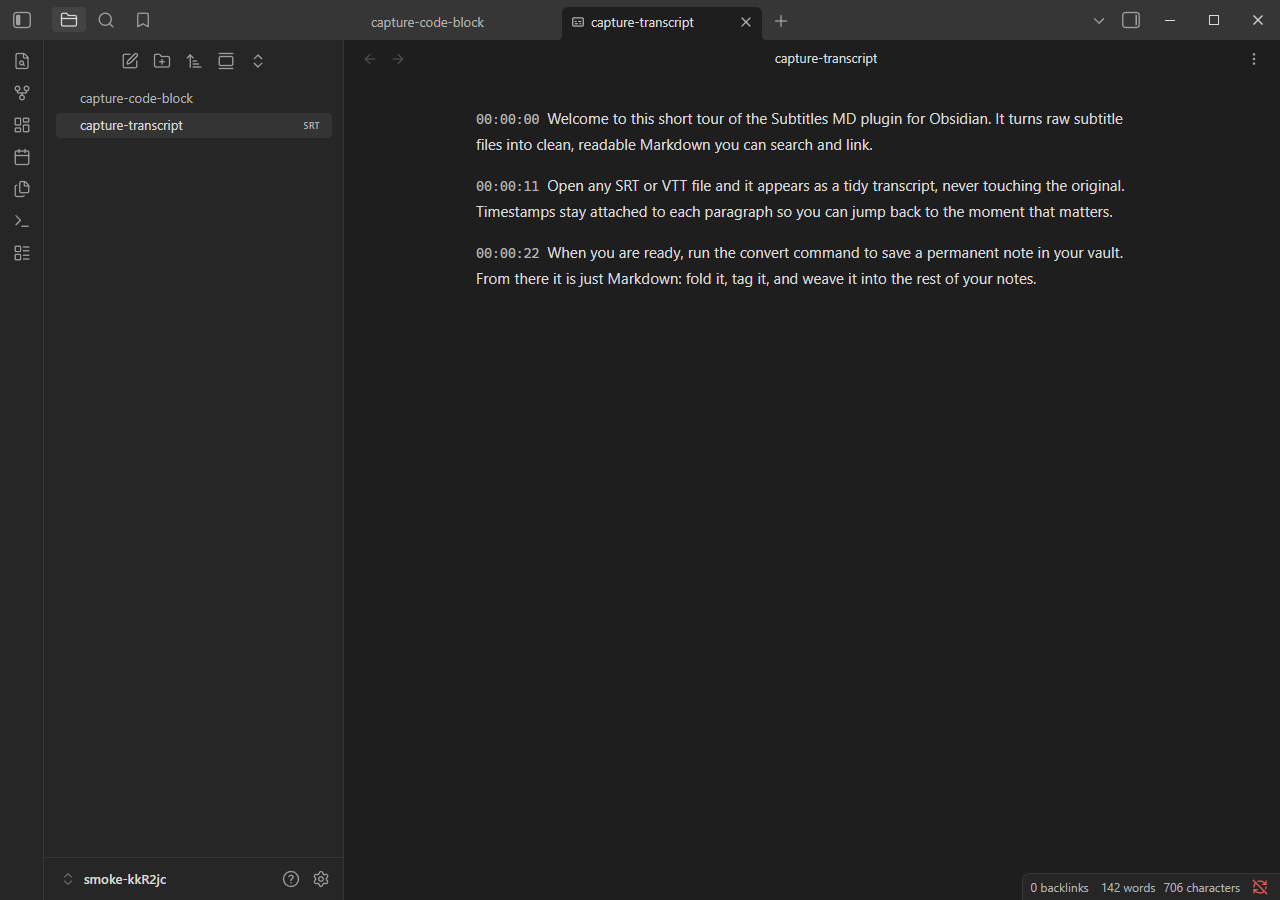
Click any .srt or .vtt file in your vault to open it as a readable transcript without converting it.
Converted Transcript Note
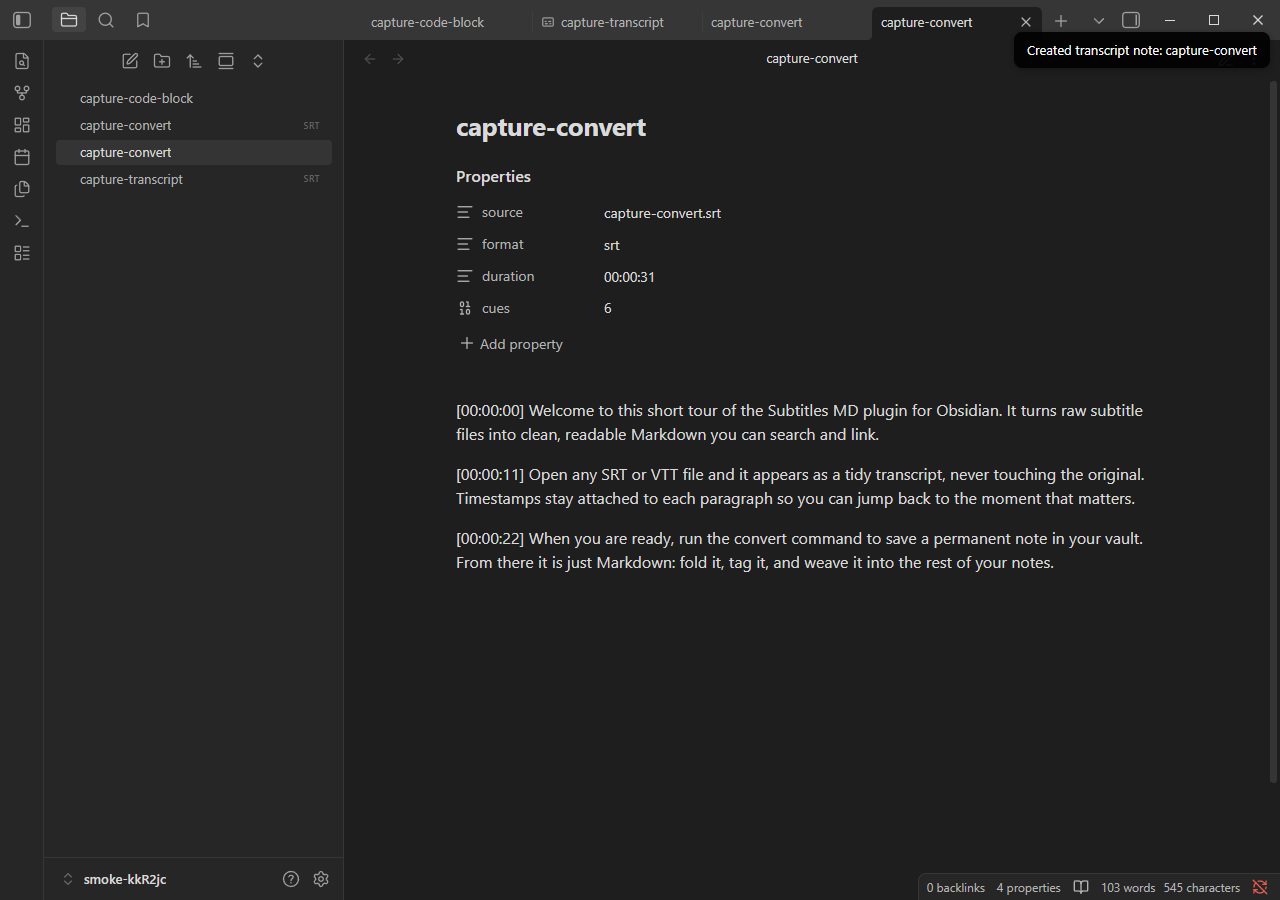
The "Convert subtitle file to transcript note" command creates a Markdown note with frontmatter properties, timestamps, and formatted speakers.
Settings Tab
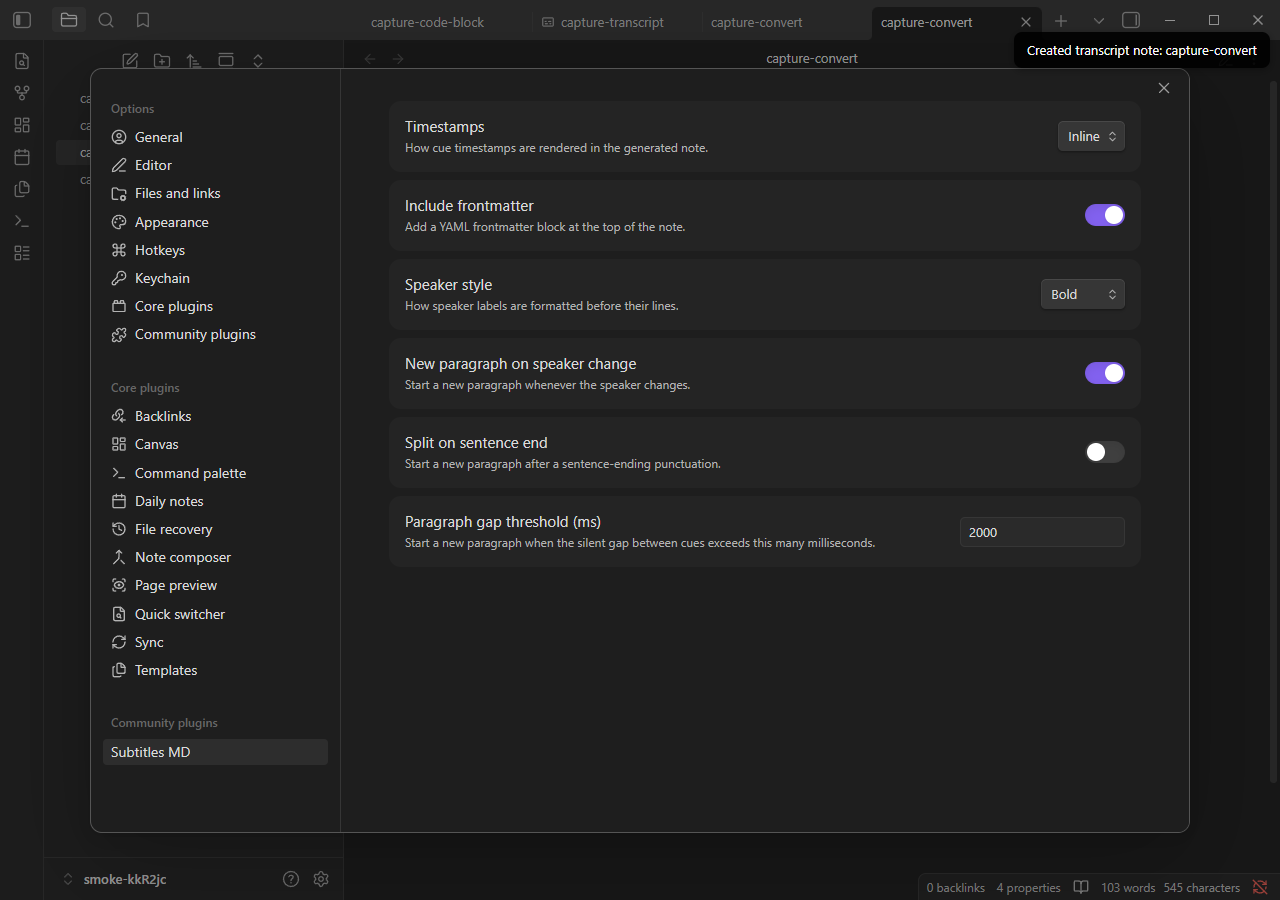
Configure reflow behavior, timestamp display, speaker formatting, and frontmatter inclusion in the plugin's Settings tab.
Why
Most subtitle/transcript plugins generate transcripts from audio (Whisper, YouTube) or sync playback with media. Subtitles MD fills a different niche: it makes existing .srt/.vtt files comfortable to read and turns their text into native, searchable Markdown. Perfect for researchers, students, and anyone who needs to read, annotate, and link transcripts without requiring media playback.
Installation
Community Plugins (recommended)
Note: Pending review. Once approved, search for Subtitles MD in Settings → Community plugins → Browse.
Manual Install
- Download or build
main.js,manifest.json, andstyles.css. - Place them in
<vault>/.obsidian/plugins/subtitles-md/. - Enable the plugin in Settings → Community plugins.
Verifying Release Provenance
Release binaries are built in GitHub Actions with build provenance attestations. Verify a downloaded asset with:
gh attestation verify main.js --repo pedrofuentes/obsidian-subtitles-md
Usage
Convert a subtitle file to a note
- Open a
.srtor.vttfile in your vault. - Open the command palette (Ctrl/Cmd+P) and run "Convert subtitle file to transcript note".
- A new Markdown note is created in the same folder, containing the transcript as readable paragraphs.
Embed a transcript code block
Reference a subtitle file in your vault:
```transcript
file: Recordings/talk.srt
```
Or paste inline subtitle content:
```transcript
1
00:00:01,000 --> 00:00:03,500
Welcome to the demo.

2
00:00:04,000 --> 00:00:06,800
This is a sample subtitle block.
```
Both render as clean, readable transcripts in reading view.
Open a subtitle file as a transcript
Click any .srt or .vtt file in the file explorer. The plugin opens it in a read-only transcript view (no conversion required).
Settings
| Setting | Description | Default |
|---|---|---|
| Timestamps | How timestamps are rendered (None / Inline / Aside) | Inline |
| Include frontmatter | Add a YAML frontmatter block with metadata | On |
| Speaker style | Format speaker labels as Bold or Heading | Bold |
| New paragraph on speaker change | Start a new paragraph when the speaker changes | On |
| Split on sentence end | Force a paragraph break at sentence boundaries | Off |
| Paragraph gap threshold (ms) | Minimum silence duration to start a new paragraph | 2000 |
Supported Formats
.srt(SubRip).vtt(WebVTT)
Development
pnpm install       # Install dependencies (Node 22+ recommended)
pnpm run build     # Build the plugin
pnpm test          # Run tests
pnpm run lint      # Lint with ESLint
pnpm run typecheck # Type-check with tsc
This project follows a test-driven development workflow with Sentinel review before merging. See AGENTS.md for details.
Testing in a Real Vault
The install:vault command builds the plugin and installs it into an Obsidian vault. The target vault is resolved in order of precedence:
--vault <path>— command-line argument (supports--vault pathor--vault=path)OBSIDIAN_VAULT— environment variabletest-vault/— the demo vault committed to this repo
Quick start with the bundled demo vault:
pnpm install:vault
Then open test-vault/ in Obsidian, reload with Ctrl+R, and enable Subtitles MD in Settings → Community plugins. Try opening Recordings/talk.srt or Demo.md in reading view.
Install to your own vault:
pnpm install:vault --vault "C:\path\to\YourVault"
# or
export OBSIDIAN_VAULT="C:\path\to\YourVault"  # Unix/macOS
set OBSIDIAN_VAULT=C:\path\to\YourVault       # Windows cmd
$env:OBSIDIAN_VAULT="C:\path\to\YourVault"    # Windows PowerShell
pnpm install:vault
Live development loop:
-
Create a symlink from your vault to the repository (one-time setup):
# Windows PowerShell
New-Item -ItemType SymbolicLink -Path "<vault>\.obsidian\plugins\subtitles-md" -Target "<repo>"
# Unix/macOS ln -s /path/to/repo /path/to/vault/.obsidian/plugins/subtitles-md -
Run the dev watcher to rebuild on changes:
pnpm dev -
Reload Obsidian (Ctrl+R) to pick up changes, or install the community Hot Reload plugin for automatic reloading.
Contributing
See AGENTS.md and docs/DEVELOPMENT-WORKFLOW.md for workflow, testing, and contribution guidelines.
License
MIT © 2026 Pedro Fuentes