README file from
GithubPeople Tree — Obsidian Plugin
Requirements: Obsidian 1.7.0 or later · Desktop and Mobile · No external dependencies
An interactive family tree, org chart and timeline viewer for Obsidian. All data lives in your vault as plain Markdown notes with YAML frontmatter — no external services, no proprietary formats, no telemetry.
Screenshots
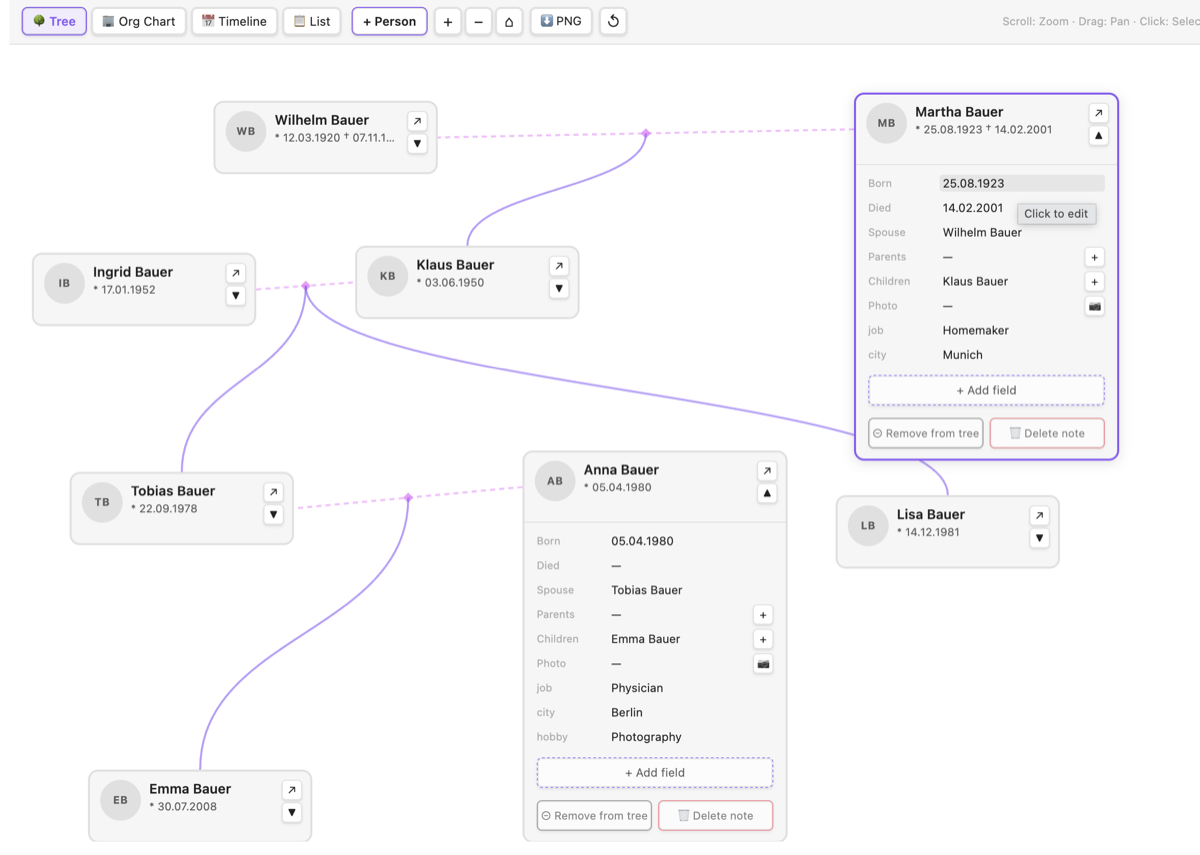
| Tree mode | Inline editing |
|---|---|
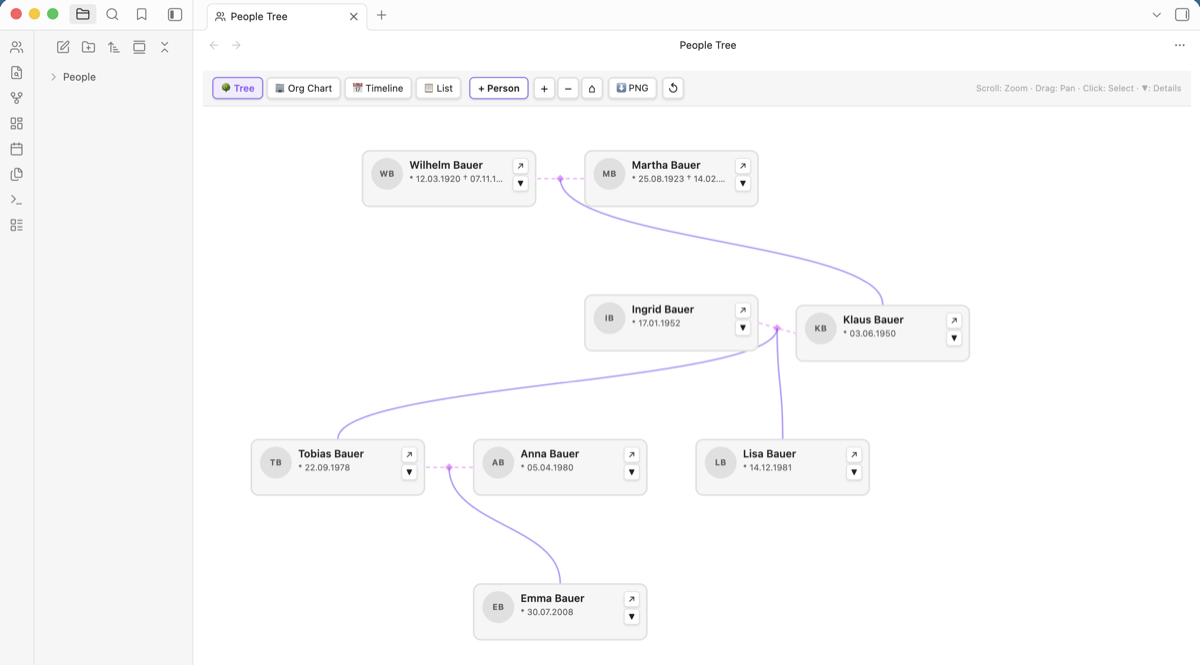 |
 |
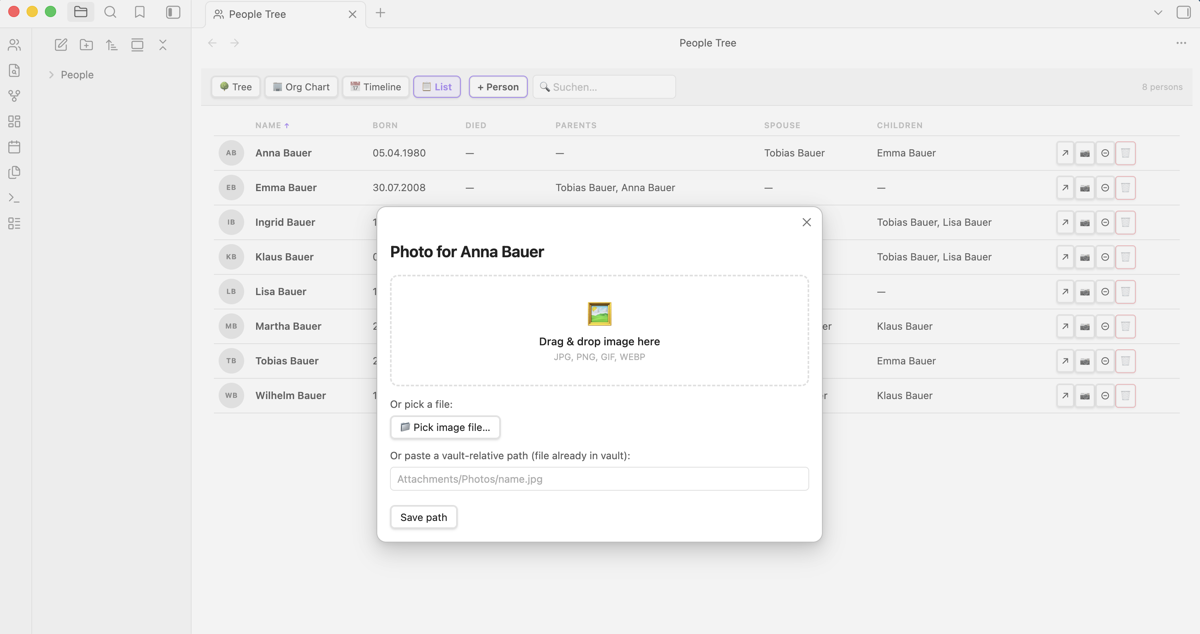
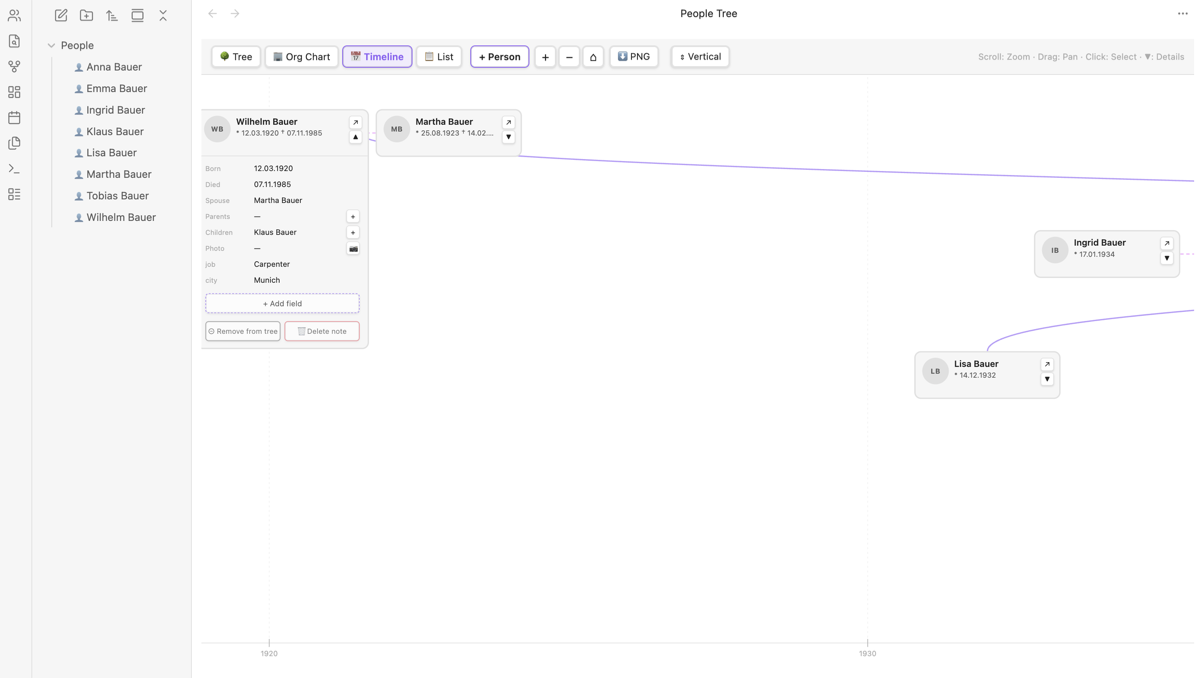
| List mode + photo upload | Timeline mode |
|---|---|
 |
 |
Features
- 4 view modes — Tree (smooth curves), Org Chart (right-angle connectors), Timeline (birth-year axis), List (searchable, sortable table)
- Drag cards freely — reposition any person card by dragging its header; layout is saved automatically and persists across sessions
- Drag notes onto the board — drag any Markdown file from Obsidian's file explorer directly into the tree view to add it as a person
- Avatars / photos — upload an image via drag & drop or native file picker; or point to any file already in your vault
- Inline editing — edit any field directly in the view; changes are written back to the note's frontmatter immediately; renaming a person also renames the file
- Add fields — add arbitrary custom fields to a person without leaving the plugin
- Selection highlighting — click a node to highlight it and all direct connections; everything else dims
- Zoom & pan — mouse wheel to zoom, drag background to pan (Tree / Org Chart / Timeline)
- Sortable list — click any column header to sort ascending / descending
- Sample family — one-click demo dataset to explore all features immediately
- File explorer icons — person notes get a 👤 badge; notes removed from the board show a dimmed badge
- Configurable — set your preferred photos folder and person notes folder in Settings
Installation
Option 1 — Community Plugin Store
Search for "People Tree" in Obsidian → Settings → Community plugins.
Option 2 — Manual
- Download
main.js,manifest.jsonandstyles.cssfrom the latest release. - Copy all three files into your vault under
.obsidian/plugins/people-tree/. - In Obsidian: Settings → Community plugins → enable "People Tree".
- Click the 👥 icon in the left ribbon, or run "Open" from the command palette.
Safe to install on existing vaults. The plugin never overwrites or deletes existing notes. It only reads notes with
type: personin their frontmatter and writes to notes you explicitly interact with.
Getting started
First launch
When no person notes exist yet you see two buttons:
+ Create first person— creates a blank note, opens it as a card with the name field focused so you can start typing immediately🎭 Create sample family— generates 8 pre-filled demo contacts (3 generations, including dates, jobs, cities, emails) so you can explore all features right away
Creating persons
1. Toolbar button — Click + Person at the top. A dialog opens where you enter a name and optional birth date. The note is created and linked automatically.
2. From within a person — Expand any card with ▼ and click the + button next to Parents or Children. This creates or links the person and updates both notes bidirectionally.
3. Drag from file explorer — Drag any Markdown note from Obsidian's left sidebar directly onto the tree canvas. The plugin adds type: person to its frontmatter and the note appears as a card immediately.
4. Manually — Create a Markdown note anywhere in your vault with type: person in the frontmatter:
---
type: person
name: Jane Doe
born: 15.03.1970
died:
avatar: People/Photos/jane.jpg
parents:
  - John Doe
  - Mary Doe
spouse: Bob Smith
children:
  - Alice Smith
---
Removing vs. deleting
| Action | What happens |
|---|---|
| ⊖ Remove from tree | Note stays in your vault; type: person is hidden internally. The 👤 icon in the file explorer dims. You can re-add the person via + Person → chips shown at the top. |
| 🗑 Delete note | Note is permanently moved to trash. A confirmation dialog is shown first. |
Moving cards
- Drag any card by its header to reposition it freely on the canvas.
- The new position is saved automatically to the plugin's data file (not the note itself).
- Click ↺ in the toolbar to reset all positions back to the automatic layout.
Frontmatter fields
| Field | Required | Description |
|---|---|---|
type: person |
Yes | Marks the note as a person. Without this the note is ignored. |
name |
No | Display name. Defaults to the file name if omitted. Renaming the name field also renames the file. |
born |
No | Birth date (any format). Used to place nodes on the Timeline axis. |
died |
No | Death date. |
avatar |
No | Vault-relative path to an image file. |
parents |
No | List of parent names. Draws parent → child connection lines. |
spouse |
No | Name of spouse/partner. Draws a line between the two nodes. |
children |
No | List of children's names. |
| any other field | No | Shown in the expanded detail panel; editable inline. |
Settings
Open Settings → People Tree:
| Setting | Default | Description |
|---|---|---|
| Photos folder | Attachments/Photos |
Vault-relative folder where uploaded photos are saved. |
| Person notes folder | People |
Limit person scan to this folder. Leave empty to search the whole vault. |
View modes
🌳 Tree
Classic top-down family tree with smooth Bézier curves connecting parents to children.
🏢 Org Chart
Same layout as Tree, but connections use right-angle elbow lines — useful for hierarchical org structures.
📅 Timeline
Nodes are positioned horizontally by birth year. Useful for spotting generational overlaps. Requires born fields with a 4-digit year.
📋 List
Searchable, sortable table of all persons. Click any column header to sort. Click a cell to edit the value inline.
Adding photos
In List mode: click the 📷 button at the end of any row.
In Tree / Org Chart / Timeline: expand a node with ▼, then click 📷 next to the "Photo" field.
A dialog opens with three options:
- Drag & drop an image from your file manager onto the drop zone
- Pick a file using the native file picker (uses the File System Access API — works reliably in Electron)
- Enter a vault path if the image is already in your vault
The uploaded photo is saved to the configured Photos folder and the avatar path is written to the frontmatter automatically.
Editing data
- In List mode: click any data cell to edit it inline. Press
Enterto save,Escto cancel. - In Tree / Org Chart / Timeline: click ▼ on a node to expand the detail panel. Click any field value to edit. Use "+ Add field" to add a custom frontmatter field.
- Changes are written directly to the note's YAML frontmatter and the view refreshes automatically.
- Renaming a person (editing the name field) also renames the underlying
.mdfile automatically.
Known Issues / TODO
| # | Issue | Status |
|---|---|---|
| 1 | Long field values are truncated in tree nodes (hover to reveal full text). | partial fix |
| 2 | Timeline mode requires at least 2 persons with a 4-digit year in born. |
by design |
| 3 | No mobile-optimised touch controls for zoom/pan yet. | todo |
Privacy & Security
- No external network calls. The plugin works fully offline.
- No telemetry or analytics.
- All data stays in your vault. Photos are copied into your vault folder; nothing is sent anywhere.
- Non-destructive by default. The plugin never overwrites existing notes on install or when creating demo contacts. Every destructive operation (delete) requires explicit user confirmation.
Notes
- The plugin scans all Markdown files in the vault (or the configured folder). Only notes with
type: personare included. - Relationship lines are drawn only when names match exactly (case-sensitive).
- Card positions are stored in
.obsidian/plugins/people-tree/data.json, not in the notes themselves — your frontmatter stays clean. - Photos are stored as binary files in the vault. They are not git-tracked unless you configure git-lfs.
Requirements
| Obsidian | 1.7.0 or later |
| Platform | Desktop (Windows, macOS, Linux) and Mobile (iOS, Android) |
| Dependencies | None — fully self-contained |
The plugin uses only the official Obsidian API (metadataCache, fileManager.processFrontMatter, vault.createBinary, fileManager.renameFile). No npm packages are bundled at runtime.
Development
git clone https://github.com/juppinger0/obsidian-people-tree
cd obsidian-people-tree
npm install
npm run build        # production build → main.js
Copy main.js, manifest.json and styles.css to .obsidian/plugins/people-tree/ in your vault and reload the plugin in Obsidian.
License
MIT — © Jörg Lortz