README file from
GithubIconik — Obsidian Plugin
Customize icons & colors on every file and folder — all from a single right-click.
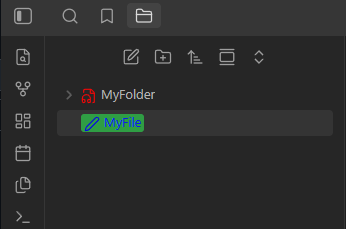
How to use
Changing an icon
- Assign any Lucide icon (1700+ icons) to any file or folder
- Pick a custom color for each icon
- Icons persist across sessions and vault restarts
- Remove icons individually or reset all at once from Settings
![]()
Changing a color
- Set a text color and/or background color on any file or folder name in the explorer
- 12 curated color presets + a full custom color palette picker
- Live preview before applying
- Colors are injected via a single CSS stylesheet — zero performance overhead

Installation
From the Obsidian Community Plugin Browser (recommended)
- Open Settings → Community plugins → Browse
- Search for Iconik
- Click Install, then Enable
Manual installation
- Download the latest release (
main.js,manifest.json,styles.css) from the Releases page - Copy the three files to
<your-vault>/.obsidian/plugins/Iconik/ - Restart Obsidian, then go to Settings → Community plugins and enable Iconik
Usage
All actions are available via right-click on any file or folder in the explorer.
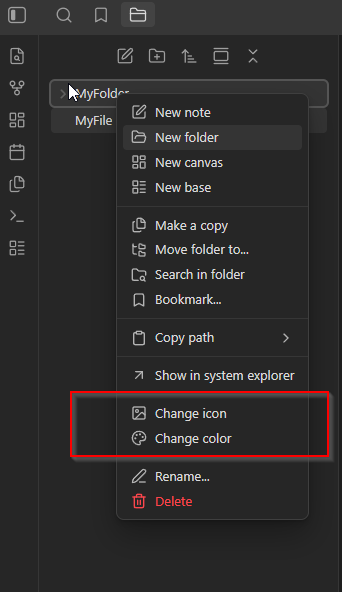
Assigning an icon
- Right-click a file or folder → Change icon
- Search or browse the icon grid
- Optionally pick a color for the icon
- Click Apply
Customizing colors
- Right-click → Change color
- Choose a text color and/or background color from the swatches or the Custom palette picker
- The live preview updates in real time — click Apply when satisfied
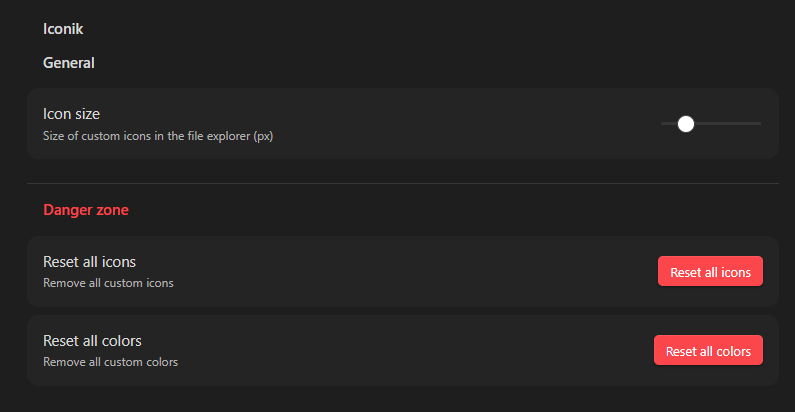
Settings
Navigate to Settings → Iconik to configure:
Internationalization
The plugin ships with full English and French translations. The language is detected automatically from Obsidian's locale setting.
To add a new language, duplicate i18n/en.json, translate all values, and name the file with the locale code (e.g. de.json for German).
Development
# Clone the repo
git clone https://github.com/creagleone/obsidian-iconik
cd obsidian-Iconik

# Install dependencies
npm install

# Development build (watch mode)
npm run dev

# Production build
npm run build
Contributing
Pull requests and issues are welcome. Please open an issue before submitting a large PR.
- Fork the repository
- Create a feature branch:
git checkout -b feat/my-feature - Commit and push
- Open a pull request against
main