
README file from
GithubObsidian 錄音筆記(Meeting Recorder)
Record online meetings and classes from inside Obsidian on macOS: system audio + microphone in one click, live transcript while recording, a whisper re-transcription afterwards, and screenshots/slides placed on the transcript timeline. Speech and text recognition run on your Mac. Apple Silicon, macOS 26+. Detailed docs are in Traditional Chinese. English summary and disclosures are at the end of this page.
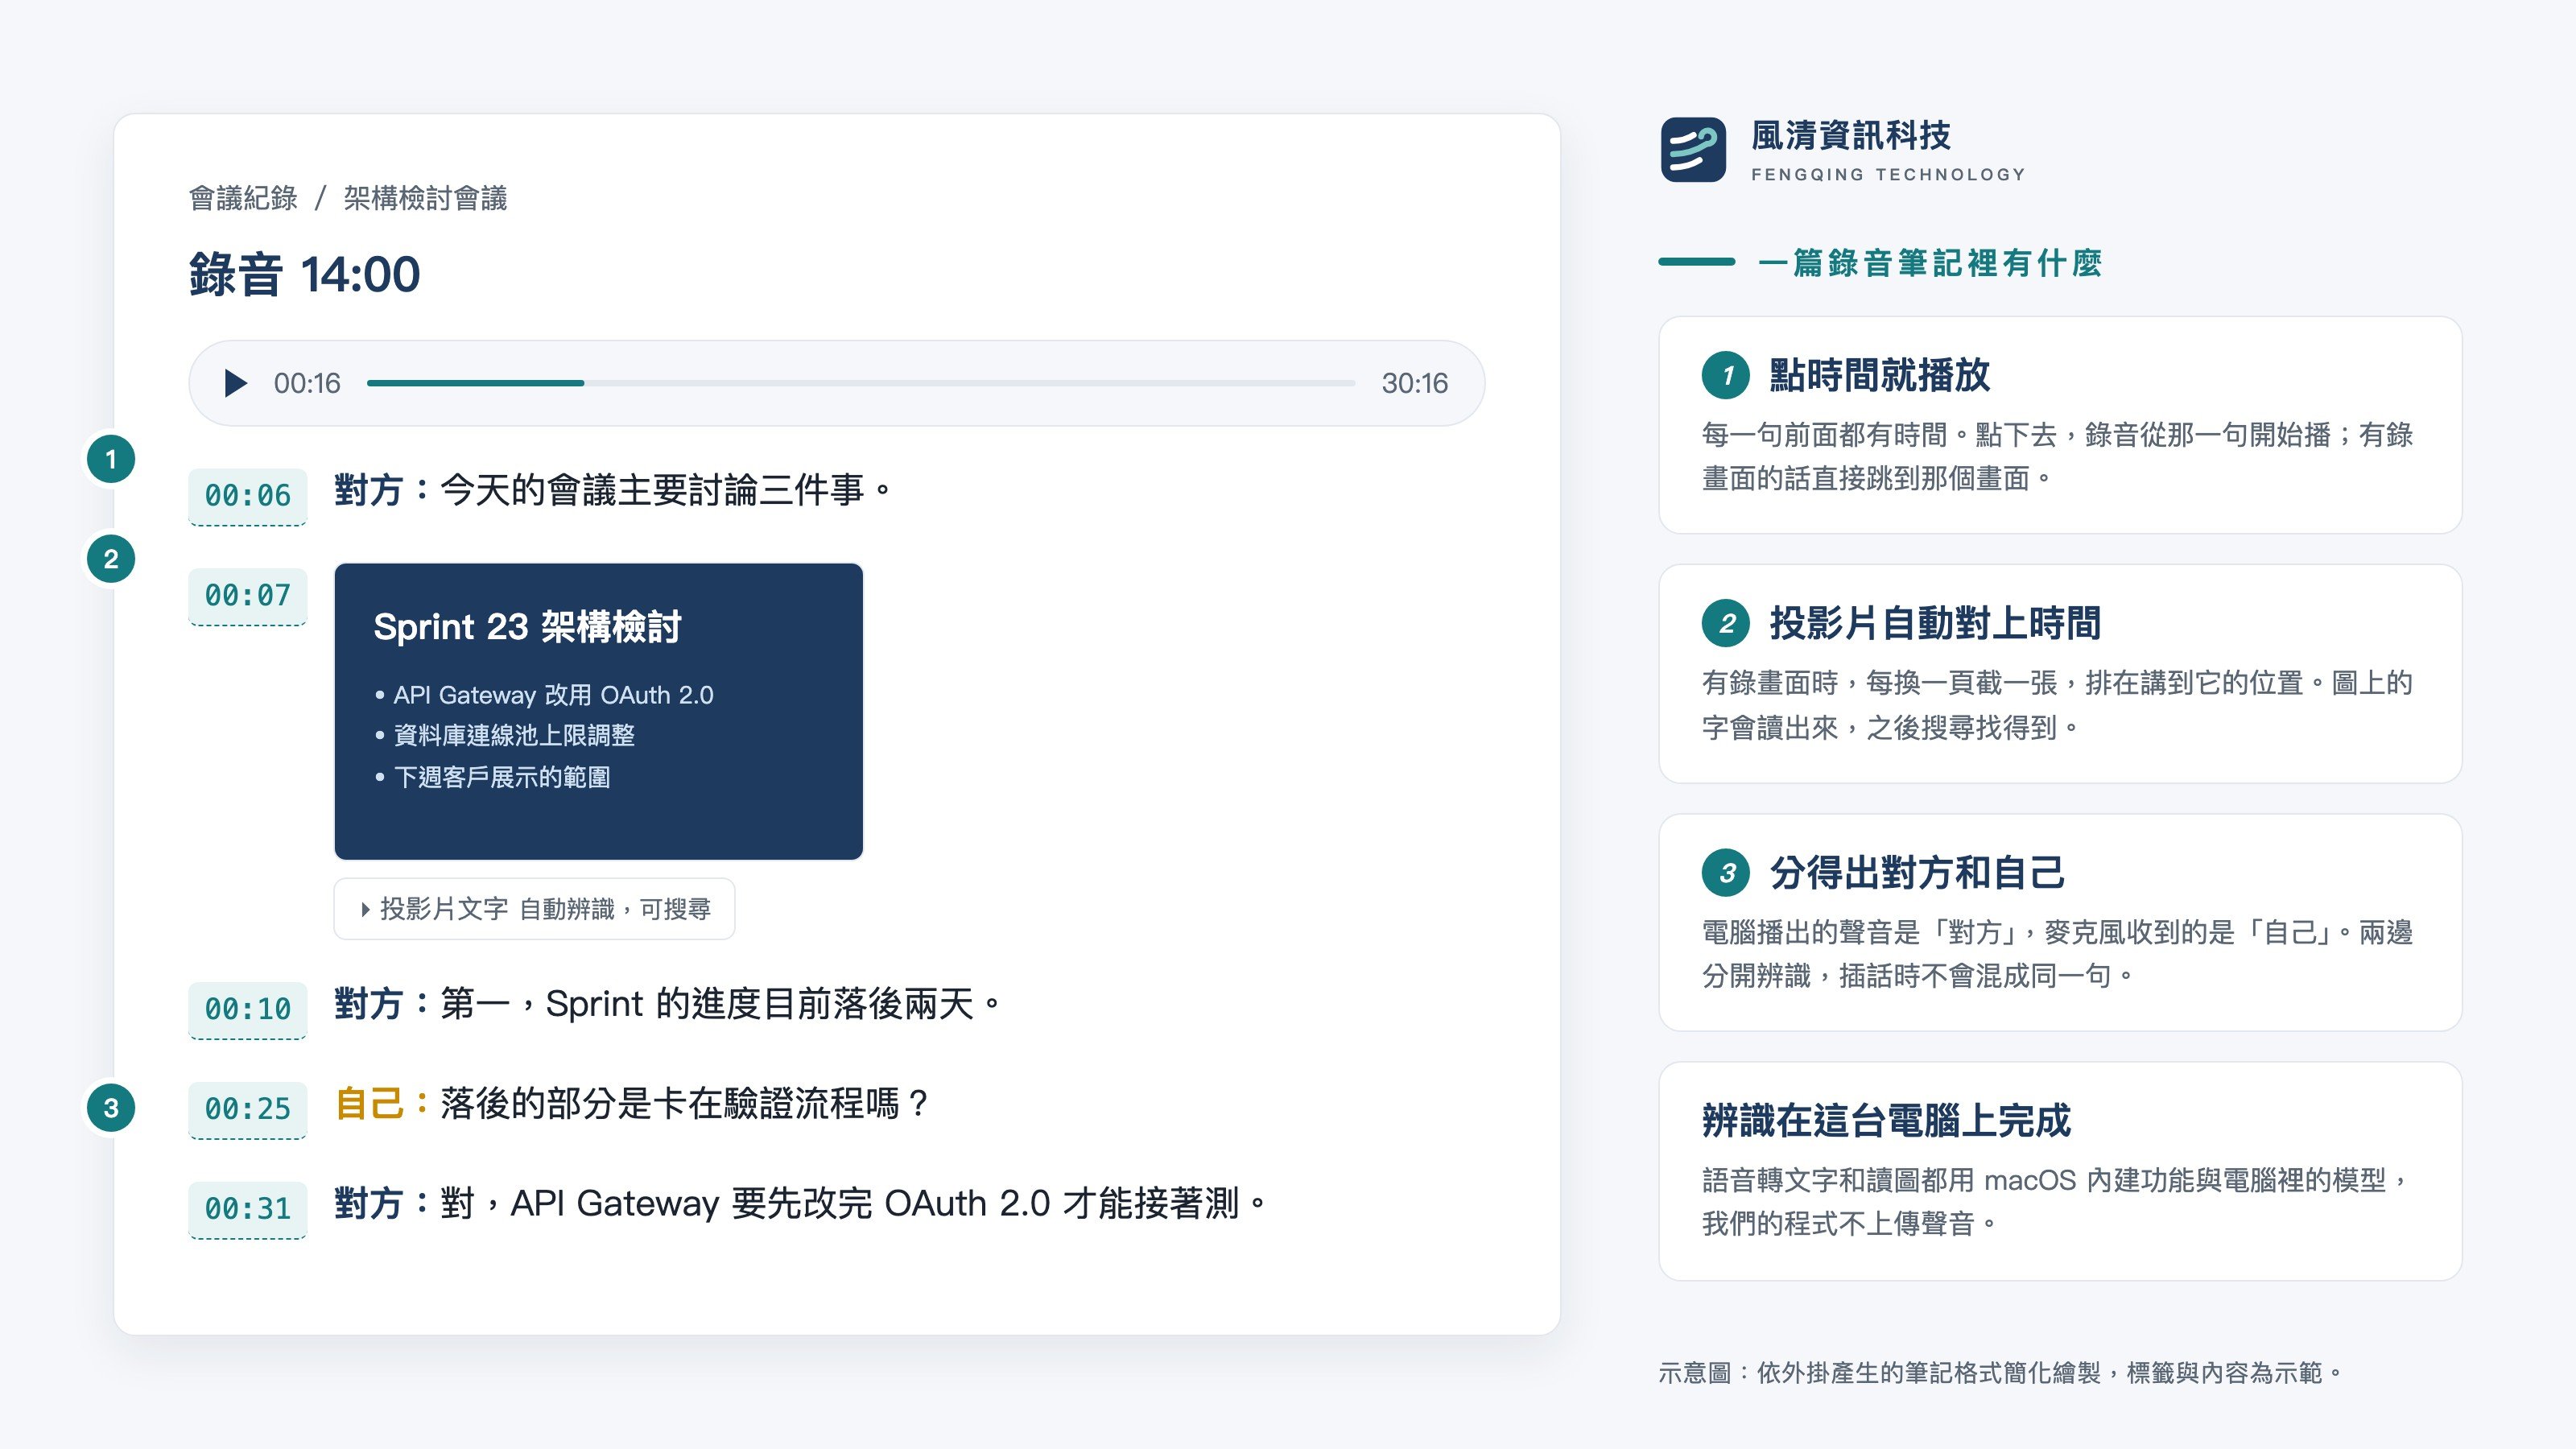
在 Obsidian 按一顆按鈕,同時錄下電腦播出的聲音和麥克風,逐字稿、截圖、投影片都收進同一篇筆記。線上會議、課程、訓練都能用。免費、開放原始碼。
先確認這三件事,再決定要不要裝:
- 只能在 Apple Silicon 的 Mac 上用,macOS 26 以上,Obsidian 桌面版。
- 逐字稿目前只支援中文。
- 除了裝外掛,還要在終端機執行一次安裝腳本,過程會下載 1.6 GB 的語音模型。
它幫你做什麼
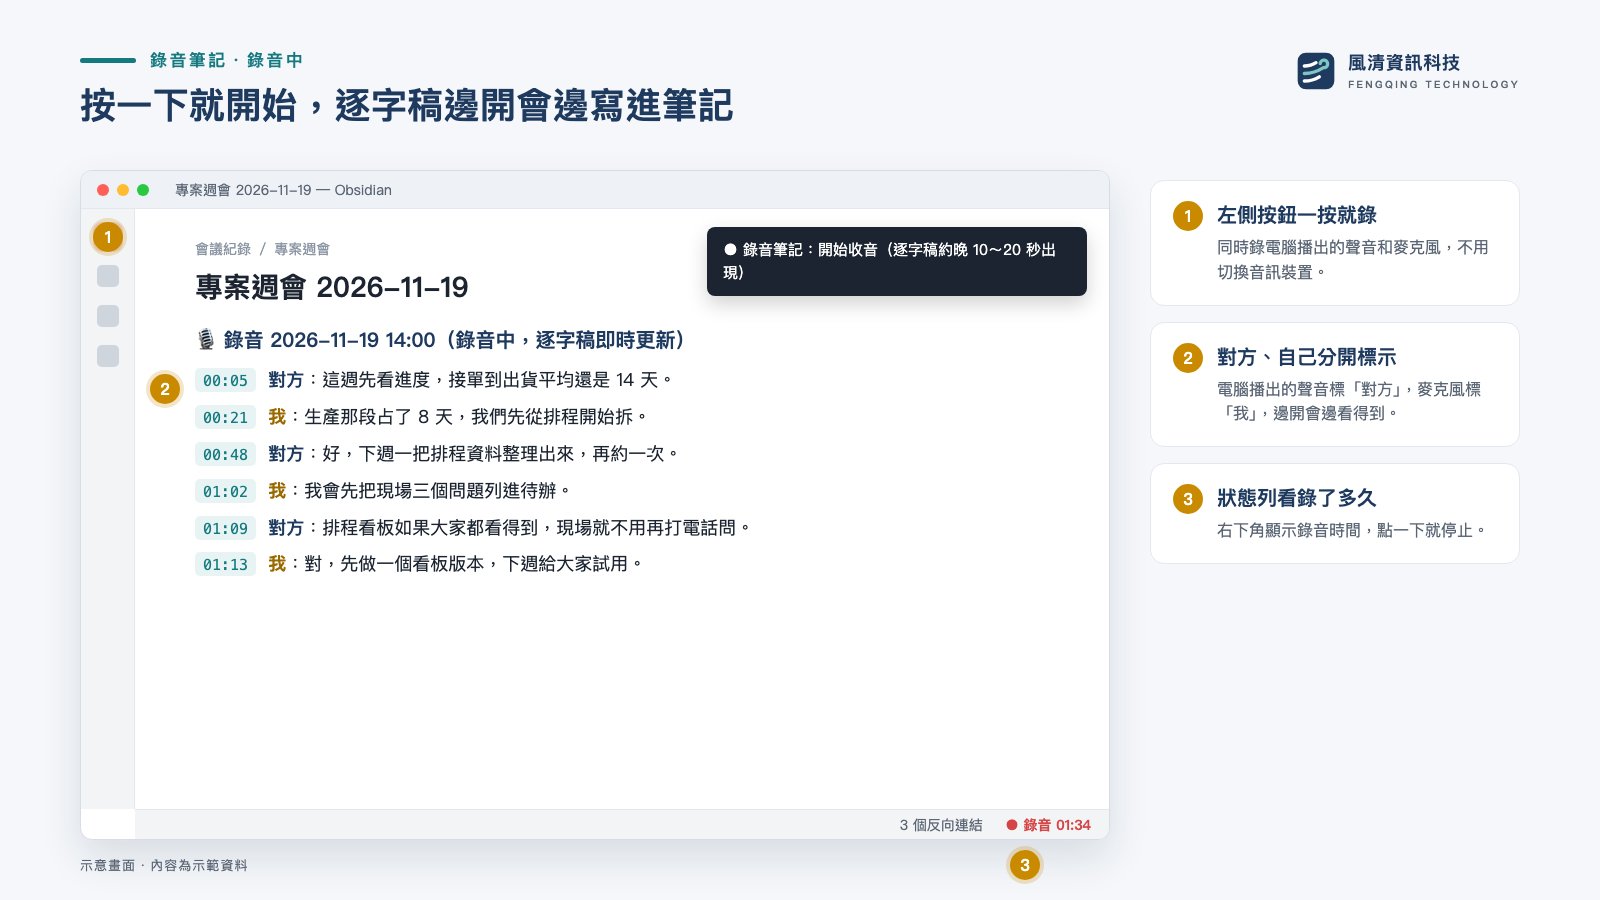
- 開會時不用忙著打字。 錄音進行中就有逐字稿,分成「對方」(電腦播出的聲音)和「我」(麥克風)。
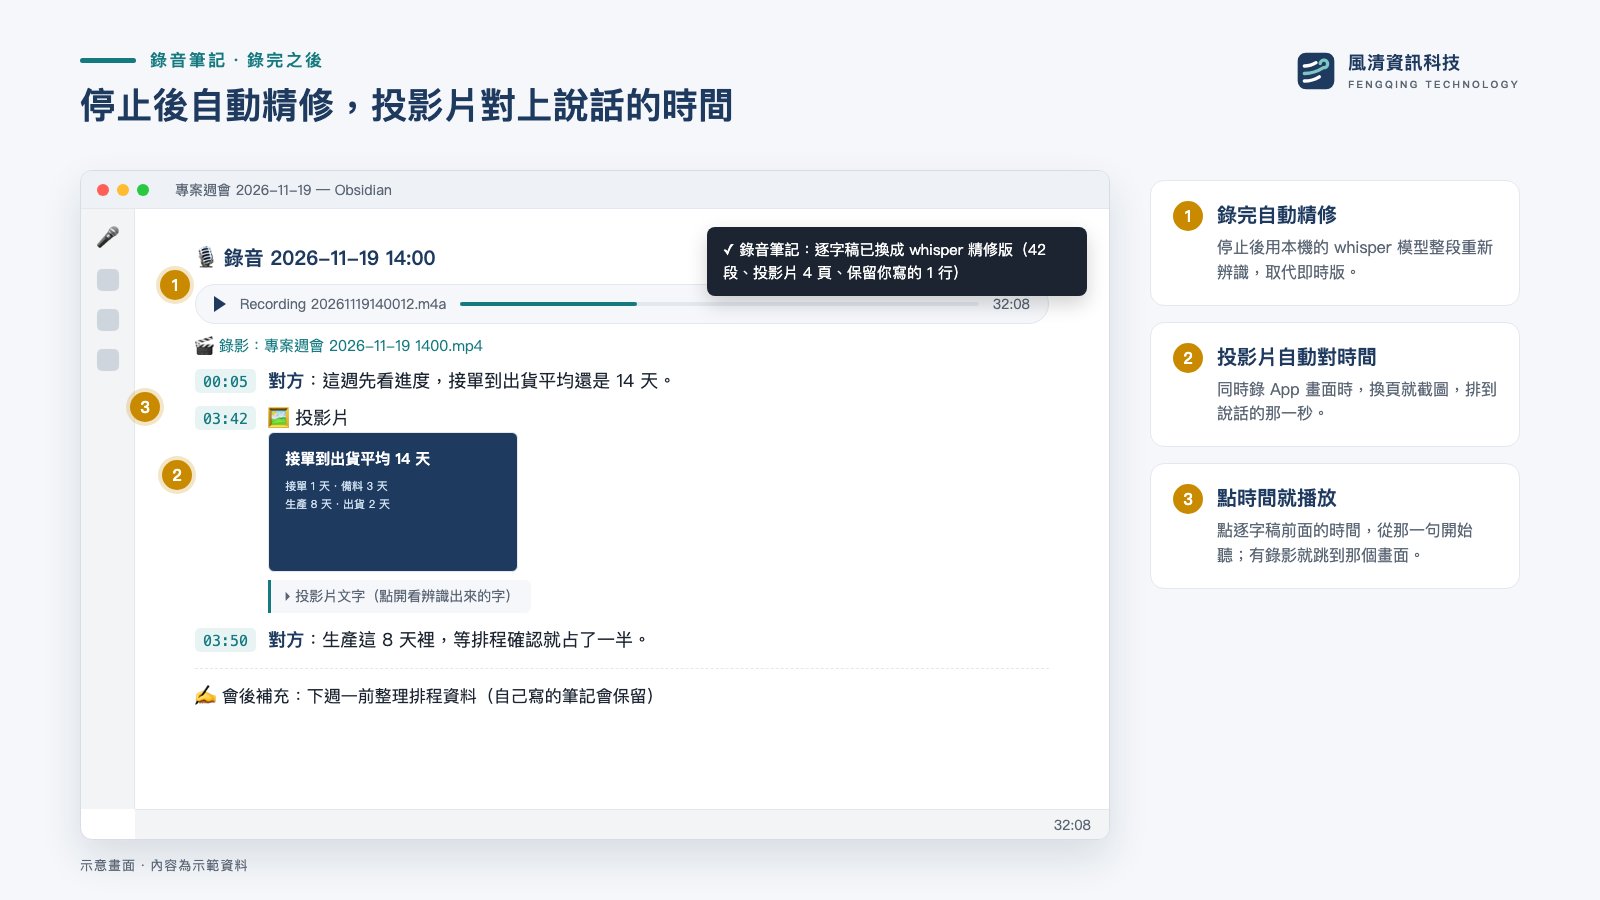
- 錄完得到比較準的版本。 停止後用 whisper 模型整段重新辨識,取代即時版。
- 截圖和投影片對得上當時講的話。 錄音中貼進筆記的截圖自動排到對應的時間,圖裡的字會辨識出來;也可以同時錄某個 App 的畫面,換頁時自動截投影片。
- 要找哪一句,點一下就到。 點逐字稿的時間,從那一句開始播放。
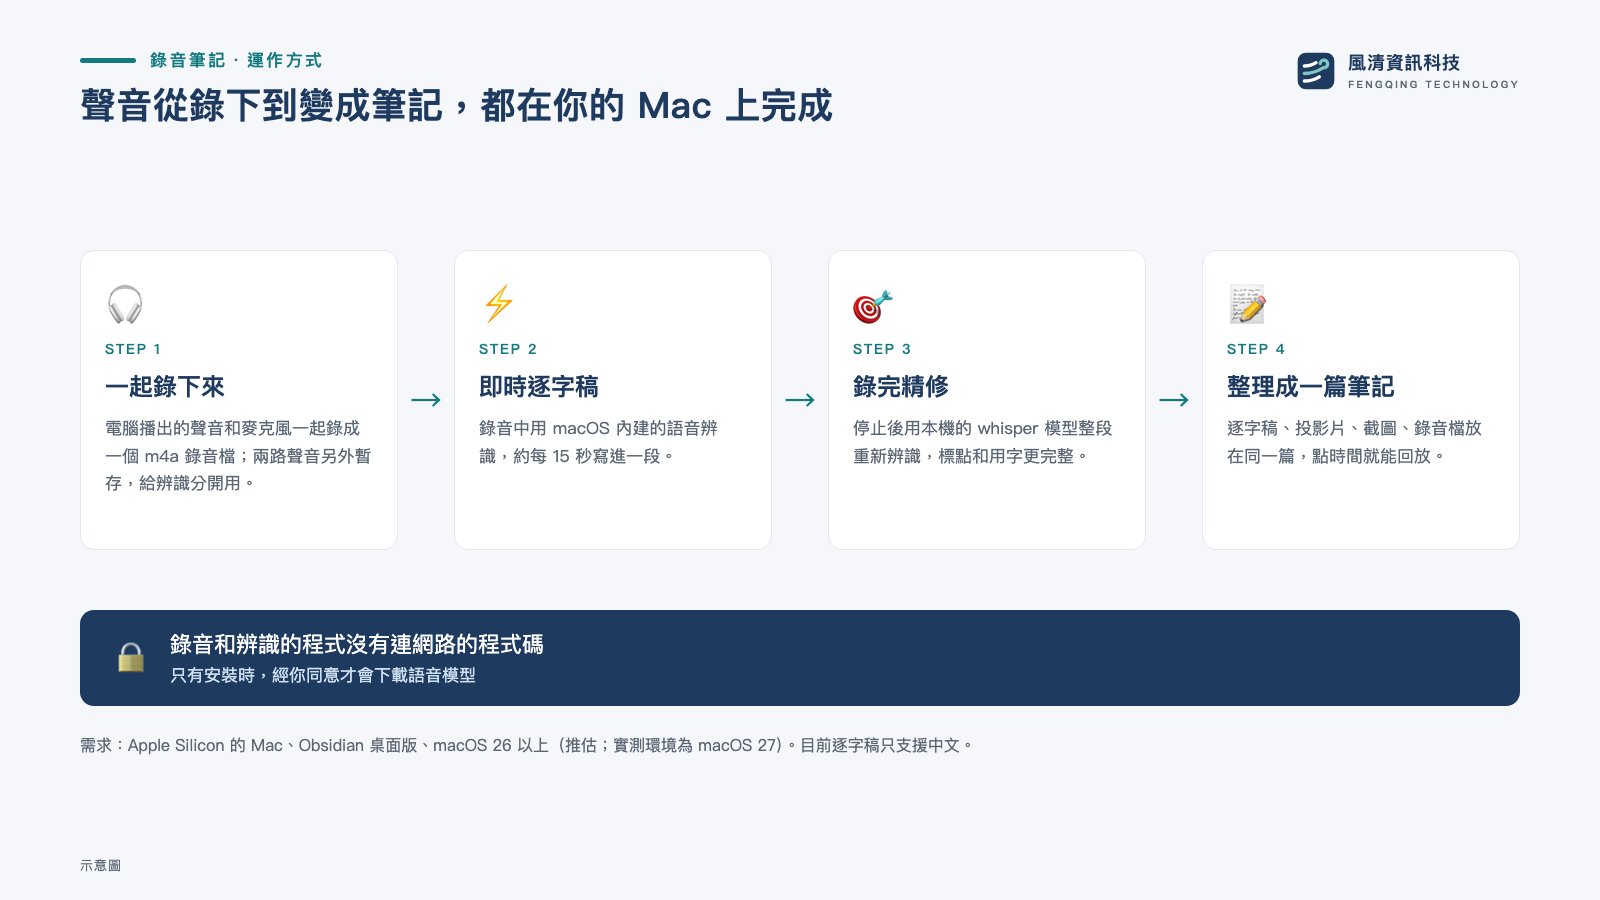
- 聲音留在你的 Mac。 語音辨識用 macOS 內建功能與本機的 whisper 模型,文字辨識用 macOS 內建的 Vision。錄音與辨識的程式沒有連網路的程式碼;只有安裝腳本在你同意時會下載模型。
使用情境
以下畫面都是示意,內容為示範資料。
線上會議:邊開邊有逐字稿
用 Teams 這類線上會議開會時,按一下左側按鈕就開始錄。它錄的是電腦播出的聲音,不挑會議軟體;實際測過的是 Teams。對方說的話和你說的話分開標示,會議還沒結束,筆記裡已經有大半的紀錄。
教育訓練、簡報說明:投影片對上講到的地方
同時錄簡報那個 App 的畫面,換頁時自動截圖,排到講到那一頁的時間。錄完用 whisper 整段重新辨識,複習時點時間就從那一句開始聽。
需要顧慮隱私的訪談
聲音只在你的 Mac 上處理:即時逐字稿用 macOS 內建的語音辨識,精修用本機的 whisper 模型。錄音與辨識的程式沒有連網路的程式碼。
搭配 AnnotateScreen:畫好的重點自動收進筆記
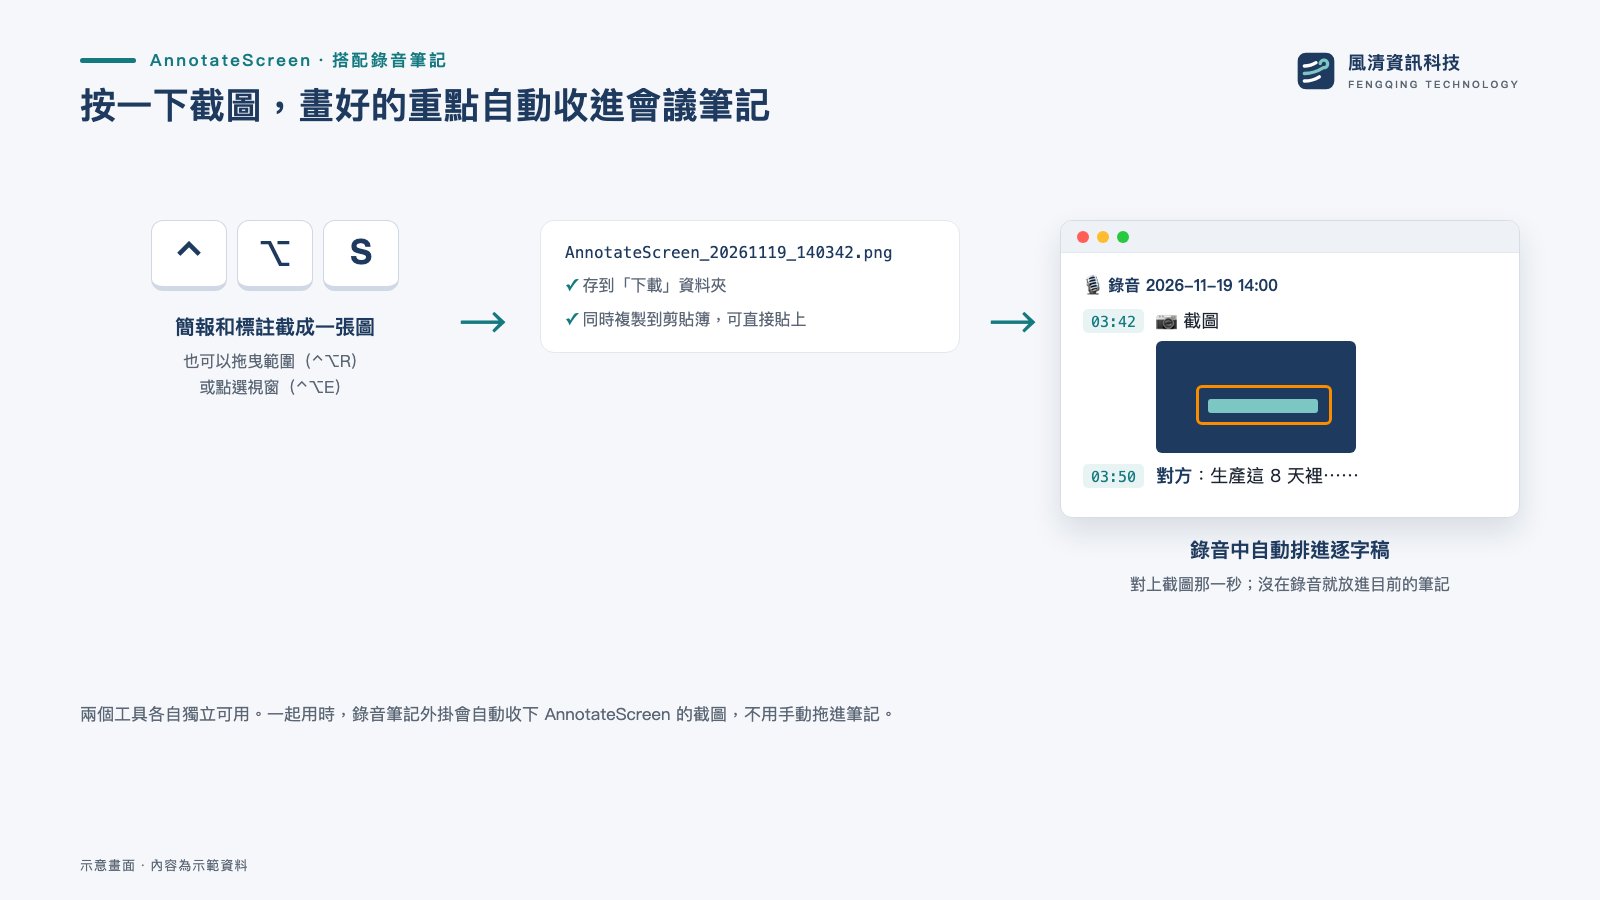
AnnotateScreen 是我們另一個螢幕標註工具。分享螢幕時用它在畫面上畫重點,按 ⌃⌥S 截圖,截圖會自動收進目前的筆記;錄音中的截圖會排進逐字稿,對上截圖的那一秒。
安裝
1. 準備環境
- Apple Silicon 的 Mac,macOS 26 以上。開發與實際使用都在 macOS 27,26 是依用到的系統功能推估,沒有實測
- Obsidian 桌面版
- Command Line Tools(在終端機執行
xcode-select --install) - Homebrew。安裝腳本會用它裝
whisper-cpp、opencc、ffmpeg,裝之前會先問你 - 約 1.6 GB 的空間放 whisper 模型
ggml-large-v3-turbo.bin,下載之前也會先問你
2. 執行安裝腳本
git clone https://github.com/FengQing-TW/obsidian-meeting-recorder.git
cd obsidian-meeting-recorder
zsh install.sh
腳本會依序做這些事:
- 檢查環境,問你要不要用 Homebrew 裝缺的套件
- 把錄音程式放到
~/.config/course-recorder/,並在本機編譯 - 問你要不要下載模型
- 把外掛裝進你指定的 vault(Obsidian 的筆記資料夾)。已經從社群外掛目錄裝過外掛的話,這一步可以跳過
可以重複執行,既有的檔案會先備份。不會用到 sudo。
3. 重新啟動 Obsidian 並允許權限
裝完重新啟動 Obsidian,左側會出現麥克風按鈕。第一次使用要依序允許 Obsidian 的麥克風、系統錄音、語音辨識權限;要錄 App 畫面再允許螢幕錄製。
也可以從 Obsidian 社群外掛目錄安裝外掛
外掛已上架 Obsidian 社群外掛目錄,可以在 Obsidian 的「設定 → 第三方外掛」搜尋 Meeting Recorder 安裝。
不管從哪裡裝外掛,都要在終端機執行一次 install.sh。 它會在本機編譯錄音程式,外掛靠這支程式錄音;沒有它,按錄音會顯示找不到錄音程式。
開始錄音
- 打開要放逐字稿的筆記,按左側的麥克風按鈕,選「只錄音」或「錄音+錄 App 畫面…」。選了之後才開始錄。錄 App 畫面時,AnnotateScreen 畫的標註會一起錄進去(工具列不會)。
- 照常開會、照常在筆記裡打字。逐字稿會一段一段寫進筆記。
- 再按一次同一顆按鈕停止。背景會用 whisper 整段重新辨識,完成後取代即時版。
完整用法、設定、出狀況時的行為,見 docs/使用說明.md。
建議戴耳機使用。測試都是戴耳機做的,用喇叭播放的情況沒有測過。
錄音前請先告知對方
這個工具會錄下電腦播出的所有聲音,包括會議裡其他人的聲音。用在會議或課程時,請先讓對方知道,並遵守主辦方、所在單位與當地法律的規定。怎麼使用由你自己負責。
它會動到哪些地方
- vault 以外的檔案: 外掛會執行放在
~/.config/course-recorder/的錄音程式和腳本,逐字稿完成前的暫存錄音也放在這裡。畫面錄影存到~/Downloads/螢幕錄影/(介面是英文時為~/Downloads/Screen Recordings/)。外掛會留意~/Downloads裡 AnnotateScreen 的截圖,把它收進筆記。 - 網路: 外掛和錄音程式不發出網路請求。語音與文字辨識用 macOS 內建功能和本機的 whisper 模型。只有
install.sh會連網路,而且是在你同意之後:用 Homebrew 裝套件、從 Hugging Face 下載 1.6 GB 的 whisper 模型。macOS 第一次使用語音辨識時,可能會自己下載系統的辨識資料。 - 帳號與費用: 不用註冊帳號,不收費,沒有廣告,不蒐集使用資料。
- 介面語言: 預設跟著 Obsidian。要固定語言,在外掛的
data.json加上"lang": "zh"或"lang": "en"。
已知限制
- 一小時以上的錄音還沒有實測過,目前最長的實錄是 30 分鐘
- 錄音程式被強制結束或電腦斷電時,錄音檔可能無法播放
- 進行中的即時逐字稿,英文術語常聽錯;錄完重新辨識後會改善,但仍可能出錯
- 對方有好幾個人時,不會分辨是誰講的
- 錄畫面時不要選 Obsidian 自己的視窗,逐字稿每出一行都會被當成換頁
- 藍牙耳機從聽音樂切到通話模式要 4 到 10 秒,這段時間的聲音錄不到
- 用藍牙耳機的麥克風時,電腦的聲音也會降成通話音質,講話聽得清楚,音樂比較悶
支援
這是自用工具,照現況提供,不保證回覆問題或修正。
覺得好用的話,歡迎在 Ko-fi 請我們喝杯咖啡,支持後續維護。
授權
MIT,見 LICENSE。相依的 whisper.cpp、OpenCC、ffmpeg 由你自己用 Homebrew 安裝,各有各的授權條款。
English summary
Before you install
- macOS only, Apple Silicon, macOS 26 or later. The plugin is desktop-only.
- The plugin needs a separate one-time setup. Installing the plugin alone is not enough: run
zsh install.shfrom this repository in Terminal. It compiles a small Swift recorder on your Mac and places it in~/.config/course-recorder/. Without it the record button shows "recorder not found". - Transcription currently supports Mandarin Chinese only (live transcript and whisper refinement). The interface follows Obsidian's language (Chinese or English).
- Please tell other participants before you record. It records everything your Mac plays, including other people in a meeting. Follow your organizer's rules and local law.
Disclosures (as required by the Obsidian developer policies)
- Files outside your vault: the plugin runs the recorder and scripts in
~/.config/course-recorder/, keeps temporary audio there until a transcript is finished, saves screen recordings to~/Downloads/Screen Recordings/(or~/Downloads/螢幕錄影/with the Chinese interface), and watches~/Downloadsfor AnnotateScreen screenshots to import. - Network use: the plugin and the recorder make no network requests. Speech and text recognition use the macOS built-in recognizers and a local whisper model. Only
install.shuses the network, and only after you confirm: Homebrew packages and the 1.6 GB whisper model from Hugging Face. macOS may download its own speech recognition assets the first time. - No account, no payment, no ads, no telemetry. The plugin is free. If it saves you time, you can support its maintenance on Ko-fi.
Settings: to force the interface language, add "lang": "en" or "lang": "zh" to the plugin's data.json (default "auto" follows Obsidian).